
Your Lull mattress cover needs cleaning, but you’re hesitating at the washing machine, unsure whether hot water will ruin it or if the dryer will shrink it beyond use. You’re not alone—most people treat mattress covers as mysterious laundry challenges, often risking damage through guesswork. Proper cleaning preserves your Lull mattress investment while maintaining a hygienic sleep environment, but incorrect methods can lead to permanent shrinkage, compromised waterproofing, or elastic band failure. This guide provides clear, actionable steps for safely washing your Lull mattress cover while protecting both the fabric and your warranty. You’ll discover how to identify your specific cover type, select appropriate washing parameters, and dry your cover correctly—without relying on internet myths that could ruin your expensive bedding.
Locate and Interpret Your Lull Care Label First
Your Lull mattress cover’s care label holds the definitive washing instructions tailored to your specific model’s materials. This small fabric tag, typically sewn into a seam near the corner zipper, contains critical symbols and text that override any general advice—including this guide. Before removing your cover, carefully examine this label under good lighting, as the tiny print and symbols can be difficult to read.
Care labels use universal symbols indicating maximum water temperature (a bucket symbol with numbers), washing cycle intensity (hand wash vs. machine wash symbols), drying restrictions (square with circle for tumble drying), and bleach prohibitions (triangle symbols). If your label specifies “do not tumble dry” or “max 30°C,” these instructions are non-negotiable for maintaining warranty coverage. Take a clear photo of the label with your phone before removing the cover—you’ll thank yourself later when you’re double-checking instructions mid-process. If your label is missing or illegible, contact Lull customer support with your mattress model number before proceeding, as guessing could void your warranty.
Remove and Prepare Your Mattress Cover Properly

Removing your Lull mattress cover requires technique to avoid damage to both the cover and your mattress. Start by stripping all sheets and bedding, then locate the zipper closure—typically running along one side or multiple sides depending on your model. Unzip completely before attempting removal, as forcing a partially zipped cover can tear seams. Work slowly from one corner, gently stretching the elasticized edges away from the mattress corners.
Once removed, immediately vacuum your now-exposed mattress surface with an upholstery attachment to remove dust mites, dead skin cells, and debris that accumulate over time. Take the cover outside and shake it vigorously to dislodge loose particles—this simple step prevents your washing machine from clogging with hair and dust. For heavily soiled covers, use a soft brush to loosen embedded dirt from the fabric surface before washing. Never skip this preparation phase, as washing a cover full of debris stresses both your machine and the cover’s fabric, potentially causing premature wear.
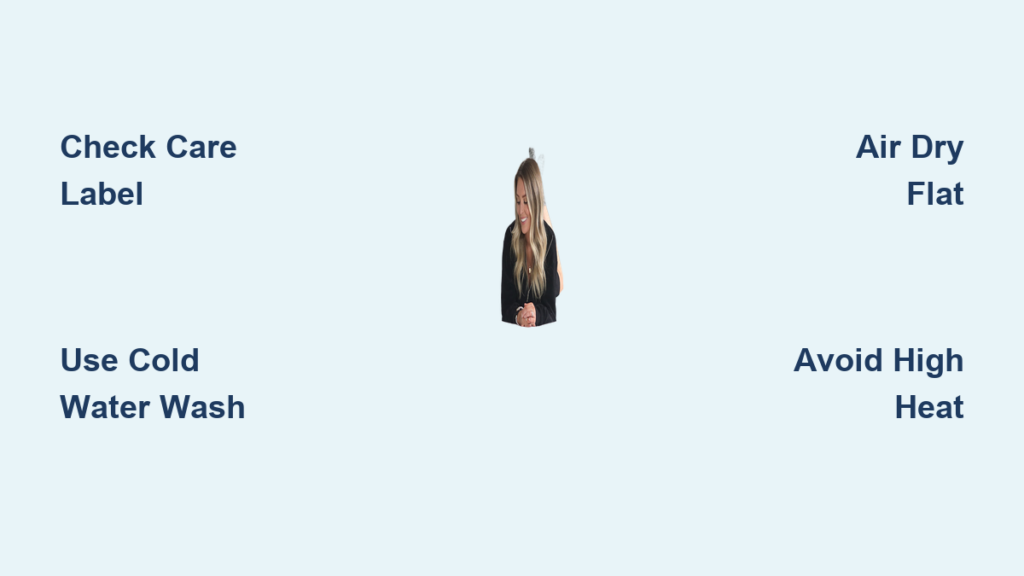
Set Correct Washing Machine Parameters
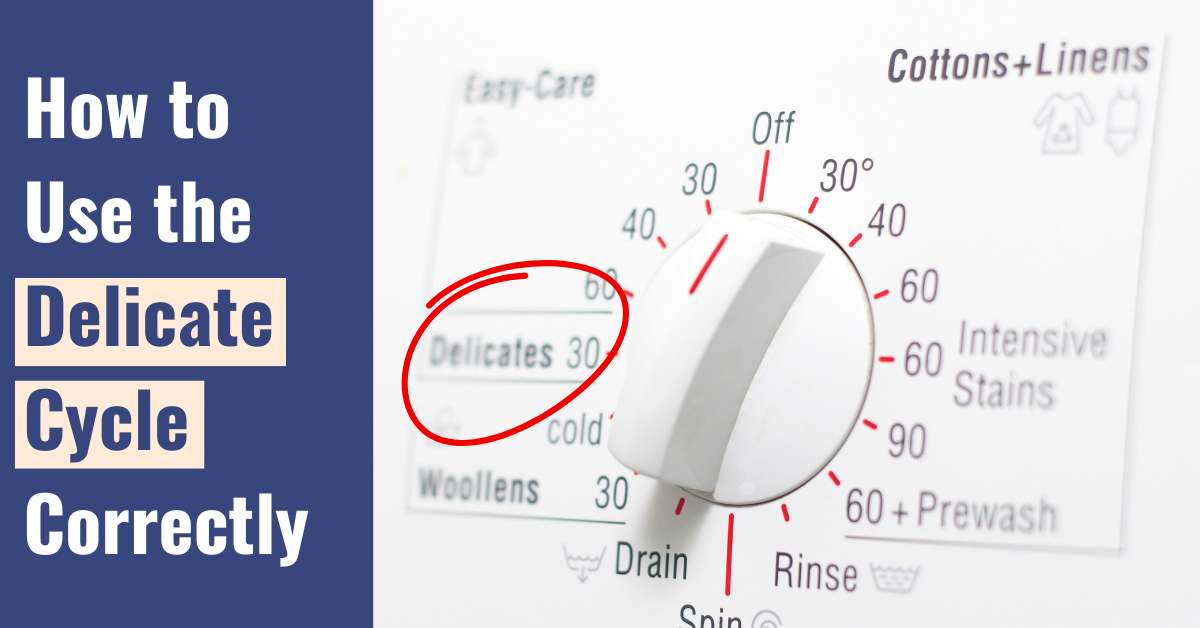
Your washing machine settings make or break the cleaning process for delicate mattress covers. Based on universal care principles for similar products (always verify against your specific Lull label), use cold water (30°C/86°F maximum) on a gentle cycle with minimal agitation. Hot water degrades elastic fibers and can melt any waterproof membranes bonded to the fabric, causing permanent damage.
Select the lowest spin speed available—typically 400-600 RPM—to prevent seam stress and fabric distortion. If your machine offers a “bedding” or “delicates” cycle, this is ideal. Front-loading machines generally handle large items better than top-loaders, but avoid overfilling—your cover should have room to move freely in the drum. Never wash your mattress cover with heavy items like towels or jeans that could cause abrasion. For optimal results, use half the detergent amount you’d normally apply to a regular load, as excess soap residue attracts dirt and can compromise moisture-wicking properties.
Choose Safe Detergents and Avoid Harmful Additives
The detergent you select directly impacts your cover’s longevity and performance. Opt for a mild, fragrance-free liquid detergent without optical brighteners, enzymes, or bleach—these chemicals degrade synthetic fibers and waterproof coatings over time. Powder detergents often don’t dissolve completely in cold water cycles, leaving residues that attract dirt and create stiff patches on your cover.
For odor removal, add ½ cup of distilled white vinegar to the rinse cycle instead of fabric softener, which coats fibers and reduces breathability. Never use chlorine bleach unless explicitly permitted on your care label—it breaks down elastic fibers and can yellow white fabrics. For stubborn stains, oxygen-based stain removers are safer than chlorine alternatives, but always test on an inconspicuous area first. Remember that less is more: excessive detergent creates more work for your machine to rinse out, potentially leaving residues that compromise your cover’s moisture management properties.
Pre-Treat Stains Without Damaging Fabric
Effective stain treatment requires matching your approach to the stain type while protecting fabric integrity. For fresh liquid spills (water-based stains), immediately blot with a clean microfiber cloth—never rub, as this pushes liquid deeper into fibers. Apply a small amount of diluted dish soap (1 part soap to 10 parts water) to the affected area and gently dab with a clean cloth.
For protein-based stains like sweat or bodily fluids, cold water is essential—heat sets these stains permanently. Create a paste of baking soda and water, apply to the stain, and let sit for 30 minutes before washing. Blood stains respond well to hydrogen peroxide (3%) dabbed gently with a cotton swab, but test first on colored fabrics. Oil-based stains (lotions, makeup) require cornstarch or talcum powder to absorb excess oil before washing—sprinkle generously, let sit 15 minutes, then brush off before pretreating with a small amount of dish soap. Always rinse pretreatment solutions thoroughly before machine washing to prevent chemical interactions.
Dry Your Cover Without Shrinkage or Damage
Improper drying causes more mattress cover damage than incorrect washing. Air drying is universally safest—lay the cover flat on a clean surface or hang it over a clothesline away from direct sunlight, which fades colors and weakens fibers. Rotate the cover periodically to ensure even drying, as trapped moisture leads to mildew.
If your care label permits machine drying, use the lowest heat setting (“air fluff” or “tumble dry low”) with no heat. Add 2-3 clean tennis balls to the dryer to prevent fabric clumping and maintain loft. Remove the cover while still slightly damp (about 90% dry) and finish air drying to prevent heat damage from extended machine time. Never use high heat—most mattress covers contain elastic components that degrade rapidly above 40°C (104°F). Check the cover every 20 minutes during drying to ensure it’s not becoming misshapen or overly stretched. Complete drying typically takes 12-24 hours depending on humidity, so plan accordingly.
Reinstall Your Cover with Professional Results
Restoring your clean, dry cover requires technique to achieve a smooth, secure fit. Start by aligning the corner seams precisely with your mattress corners—most Lull covers have reinforced corners that match mattress dimensions. Work one corner at a time, stretching the elastic gently but firmly over each corner before moving to the next.
For full-elastic covers, use a “push-under” technique along each side rather than stretching the entire perimeter simultaneously. Begin at the head of the bed, tuck the elastic edge under the mattress, then work toward the foot, smoothing out wrinkles as you go. If your cover has non-slip strips or grip technology, ensure these face downward against the mattress surface. Proper installation prevents bunching that creates uncomfortable sleeping surfaces and uneven wear. Once secured, walk around the mattress to verify even tension on all sides—your cover should feel taut but not strained.
Maintain Your Cover Between Washes
Extending time between washes preserves your cover’s lifespan while maintaining hygiene. Always use a top sheet as a primary barrier against body oils and sweat—this simple step reduces deep cleaning frequency by 50% or more. Vacuum your mattress cover monthly with an upholstery attachment to remove surface dust and allergens before they penetrate deeper layers.
Address spills immediately by blotting (not rubbing) with a clean cloth, then applying a small amount of water-vinegar solution (1:1 ratio) to neutralize odors. Allow the area to air dry completely before remaking your bed. Rotate your mattress quarterly to distribute wear evenly, which prevents localized soiling that requires frequent spot cleaning. During humid months, run a dehumidifier in your bedroom to reduce moisture absorption by your mattress and cover, minimizing the need for corrective washing.
Determine Your Optimal Washing Schedule
Your personal washing frequency should balance hygiene needs with fabric preservation. Most sleepers benefit from washing every 3-4 months under normal conditions, but several factors may require adjustments. Allergy sufferers or pet owners should wash monthly to reduce allergen buildup, while those who sweat heavily may need bi-monthly cleaning during summer months.
Watch for these signs indicating immediate washing is needed: visible stains that don’t respond to spot cleaning, persistent odors when moving the mattress, increased nighttime allergy symptoms, or a noticeably sticky or stiff texture on the cover surface. Never wash more than once monthly unless absolutely necessary—over-washing degrades elastic components and waterproof coatings significantly faster than regular use. Establish a seasonal schedule: more frequent cleaning in humid months, less during dry winter periods when moisture accumulation is minimal.
Final Note: While this guide provides general best practices for mattress cover care, Lull’s specific requirements for your model may differ. Always prioritize the instructions on your product’s care label over any general advice. If your care label is missing or unclear, contact Lull customer support directly with your mattress model number before washing—this simple step protects your warranty and prevents costly damage. Remember that proper maintenance extends your mattress cover’s life significantly, keeping your sleep environment clean and comfortable for years to come.


