
That box sitting in your bedroom promises better sleep, but rushing through Leesa mattress setup could mean weeks of discomfort or even damage to your investment. Many new owners make critical mistakes during unboxing that lead to uneven expansion, lingering odors, or foundation compatibility issues that compromise long-term performance. Following the precise steps in this guide ensures your Leesa mattress reaches its full potential without the common pitfalls that plague first-time setup. You’ll discover exactly how to unbox safely, position correctly, and give your new mattress the ideal conditions to expand properly—all within a single afternoon.
Don’t let the compact box fool you—what appears to be a simple unrolling process actually requires specific techniques to avoid damaging the premium foam layers. Whether you’ve ordered the Original, Sapira Hybrid, or Legend model, improper setup can create permanent creases or uneven firmness that affects sleep quality for months. This guide delivers the insider knowledge Leesa owners need to transform that rolled cylinder into a perfectly expanded sleep surface ready for its first night’s use.
Prepare Your Room Before Unboxing
Skip this step and you’ll likely regret it when trying to maneuver a partially expanded queen or king mattress through doorways. Take your Leesa mattress box directly to its final destination room before opening—this eliminates the impossible task of moving a fully expanded mattress later. Measure doorways and hallways in advance if you live in an older home with tight spaces, as the rolled mattress is significantly easier to transport than the fully expanded version.
Clear at least three feet of space around your foundation to give yourself room to work. Remove any existing bedding, vacuum the foundation surface, and inspect for sharp objects that could puncture the delicate foam layers during setup. If using a slatted base, verify slat spacing is no wider than 3-4 inches—excessive gaps cause uneven support that leads to premature wear in foam mattresses. Having your mattress protector and fitted sheet ready means you can complete the entire process in one efficient session without leaving the mattress exposed.
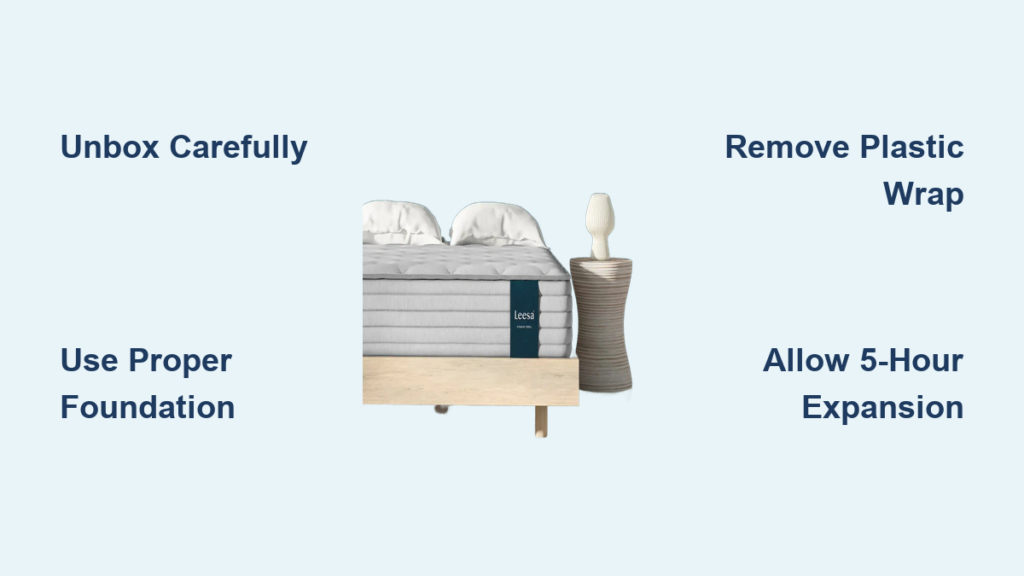
Unbox Your Leesa Mattress Without Damage

Start by positioning the box on its side where your mattress will ultimately rest, with the longest edge parallel to your foundation. Never use sharp tools like box cutters or scissors to open the packaging—these easily slice through the box and into the compressed foam inside, causing irreversible damage that voids your warranty. Instead, carefully pull apart the box flaps by hand or use a dull plastic edge to slice through tape.
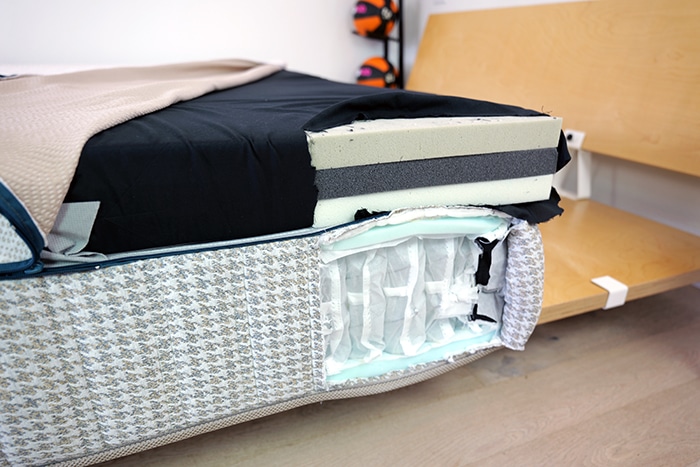
If you’re working alone, place one foot firmly on the bottom flap to stabilize the box while pulling the mattress out with both hands. The rolled mattress typically weighs 30-70 pounds depending on size, so use your legs—not your back—when lifting. Watch for the inner plastic wrapping to become visible as you pull; this indicates you’re removing the mattress correctly without snagging or tearing the foam layers inside. Rushing this step often results in accidentally yanking the mattress out too forcefully, which can create permanent creases in the foam structure.
Position the Rolled Mattress on Proper Foundation
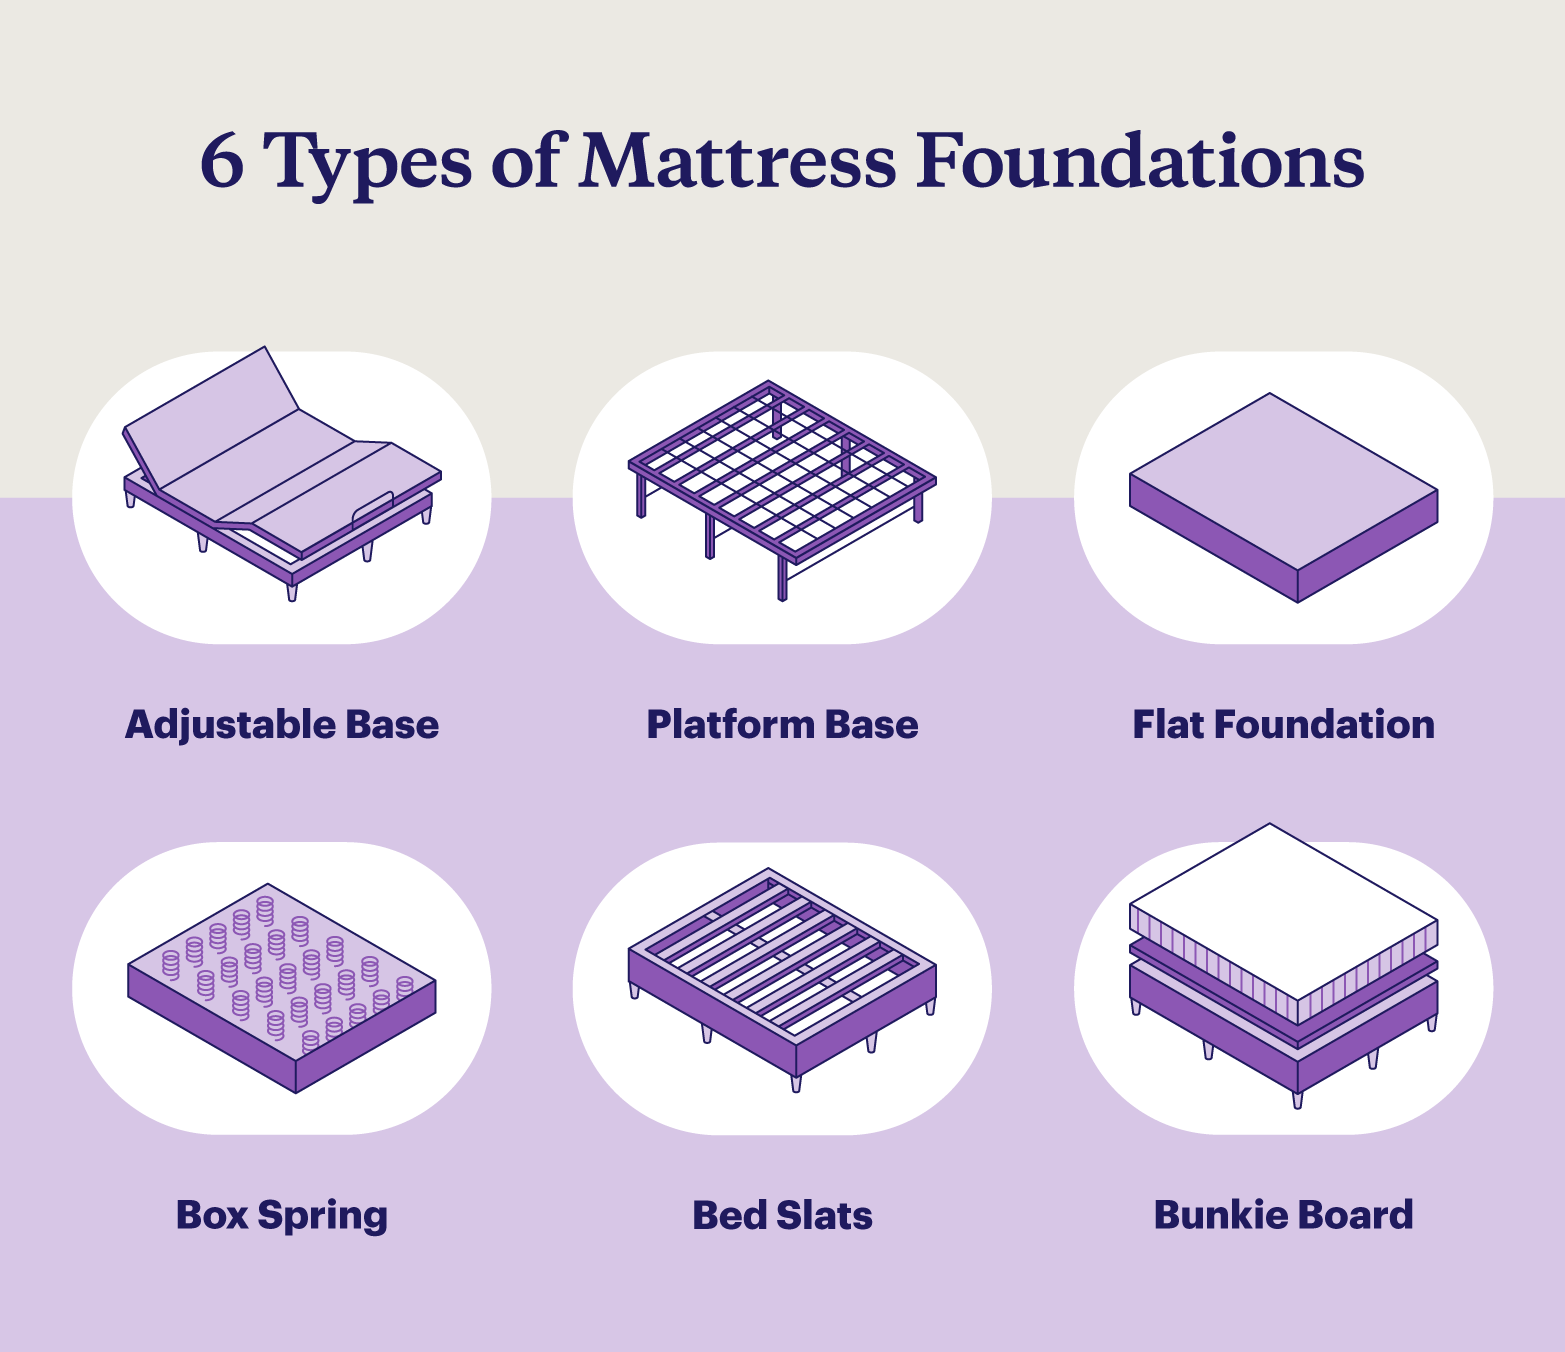
Place the still-rolled mattress directly onto your foundation rather than the floor—this eliminates the need to move it after expansion begins. The ideal foundation provides uniform support across the entire sleep surface: solid platform beds work perfectly, while slatted bases require slats spaced no more than 3-4 inches apart. Avoid traditional box springs designed for innerspring mattresses, as they lack the consistent support foam beds require.
Proper foundation selection impacts more than just initial setup—it affects your mattress warranty. Leesa requires an approved foundation to maintain coverage, so verify your base meets requirements before proceeding. If using an adjustable base, ensure it’s fully extended and locked in position before placing the rolled mattress on top. Gently center the rolled mattress on your foundation, leaving equal space on all sides to allow for even expansion in every direction.
Remove Plastic Wrapping Correctly
Begin with the outer plastic layer by locating where it meets the top of the rolled mattress and tearing at that seam. Then pull the plastic straight down in one smooth motion—like removing a sock from your foot—to strip away the entire outer layer without disturbing the mattress position. This technique prevents the common mistake of partially removing the plastic, which leaves fragments trapped beneath the mattress.
For the inner plastic layer, repeat the same sock-removal technique but work more slowly to avoid creating air pockets between the plastic and foam. Check for any remaining plastic fragments caught in the mattress edges—these often hide in the curved sections of the rolled cylinder. Complete plastic removal is critical because trapped wrap prevents proper airflow during expansion, leading to uneven firmness and potential odor retention. If you notice any plastic shards, carefully remove them with tweezers rather than your fingers to avoid puncturing the foam.
Unfold and Smooth the Expanding Mattress
As the mattress begins unfurling, guide it toward the corners of your foundation using gentle hand pressure from the center outward. Don’t force the expansion—let the foam decompress naturally while you smooth major creases with your palms. Work systematically across the surface, paying special attention to the edges where folds tend to lock in place if not addressed early.
For larger mattress sizes (queen, king, California king), enlist help to evenly distribute the weight as it expands. One person should work the head while another manages the foot section to prevent uneven stretching. Focus on creating smooth transitions between the mattress surface and edges—any sharp folds left unaddressed can become permanent impressions in the foam. This initial shaping determines how evenly your mattress will perform long-term, so take the extra five minutes to get it right.
Allow Proper Expansion Time Before Use
Your Leesa mattress needs up to five hours to reach full dimensions, but cooler room temperatures can extend this process significantly. Monitor expansion progress without disturbing the mattress—walking on it during this critical phase creates compression points that delay full recovery. The ideal room temperature for expansion is between 65-75°F (18-24°C), as extreme cold slows foam recovery while excessive heat can cause uneven expansion.
Don’t judge comfort during the first 24 hours—your mattress continues firming up over the first two weeks as the foam layers fully settle. Many owners mistakenly think their mattress is too soft initially, not realizing it’s still in the expansion phase. Set reminders to check expansion progress at 1, 3, and 5 hours to ensure proper development. If expansion seems stalled after five hours, increase room temperature slightly and check for trapped plastic that might be restricting airflow.
Manage Off-Gassing Effectively
That new mattress smell—technically “off-gassing”—typically dissipates within 24-72 hours with proper ventilation. Open windows and position fans to circulate air across the entire mattress surface, not just the top. For sensitive individuals, placing activated charcoal bags around the mattress perimeter accelerates odor removal without introducing harsh chemicals.
Never use cleaning products or sprays to mask the odor—these can damage foam cells and void your warranty. The smell comes from harmless manufacturing residues, not toxic chemicals, so immediate sleep poses no health risk despite what some online forums claim. If strong odor persists beyond 72 hours, check for trapped plastic fragments that may be causing uneven off-gassing. Most owners report the smell becomes barely noticeable by the second night, with complete dissipation by the end of the first week.
Verify Foundation Compatibility Immediately
Your foundation choice directly impacts mattress performance and warranty coverage. Solid platform bases with no gaps provide ideal support, while slatted foundations require slats no more than 4 inches apart with no flexing between supports. Test your foundation by placing your hand between slats—if you can fit more than two fingers, the spacing is too wide for optimal foam support.
Adjustable bases must have fully extended platforms with no gaps between moving sections. If your foundation fails these tests, contact Leesa customer service before proceeding—they may approve alternative solutions that maintain your warranty coverage. Using an incompatible foundation causes uneven wear that voids warranty claims, so this verification step protects your investment long-term.
Final Check Before First Night’s Sleep
Before adding sheets, perform these three critical checks: First, run your hands across the entire surface to detect any hidden plastic fragments or uneven firmness. Second, verify the mattress has expanded to its full dimensions (typically within 1-2 inches of listed size). Third, confirm no permanent creases remain from the initial unrolling process.
Add your mattress protector and fitted sheet only after passing these checks—once covered, addressing issues becomes significantly more difficult. For your first night, sleep without additional toppers to properly assess the mattress’s natural feel. Remember that full comfort evaluation requires 30 nights of use as both you and the mattress continue adjusting to each other.
Your patience during setup pays dividends in years of comfortable sleep. By following these precise steps, you’ve given your Leesa mattress the ideal start it needs to deliver optimal support and pressure relief. Keep windows open for the first few nights to accelerate off-gassing, and resist judging comfort until after the full two-week expansion period. When properly set up, your Leesa mattress will provide consistent, restorative sleep for years to come—starting with your very first night. Now that your mattress is perfectly positioned and expanded, all that’s left is to enjoy the deep, uninterrupted sleep you’ve been waiting for.


