
If your mattress has lost its cushioning or you’re looking for an affordable way to enhance your sleep surface, a homemade mattress topper might be the perfect solution. Unlike store-bought options that can cost hundreds of dollars, creating your own mattress topper allows you to customize thickness, firmness, and materials to match your exact sleep preferences. Whether you’re dealing with a too-firm mattress that’s causing pressure points or simply want to extend the life of your current bedding investment, this guide will walk you through the entire process of crafting a professional-quality mattress topper from scratch. You’ll discover how to select the right materials, calculate precise measurements, and assemble a comfortable layer that transforms your sleep experience without breaking the bank.
Essential Materials for Your DIY Mattress Topper
Before starting your mattress topper project, gather these critical components to ensure professional results. The right materials make all the difference between a topper that lasts years versus one that sags within months.
Choosing the Perfect Filling Material
Your filling selection determines comfort, durability, and temperature regulation. Consider these options based on your sleep needs:
- Memory foam: Provides contouring support that relieves pressure points (ideal for side sleepers)
- Latex foam: Offers responsive bounce with natural cooling properties (best for hot sleepers)
- Polyester fiberfill: Budget-friendly option that’s easy to work with but less durable
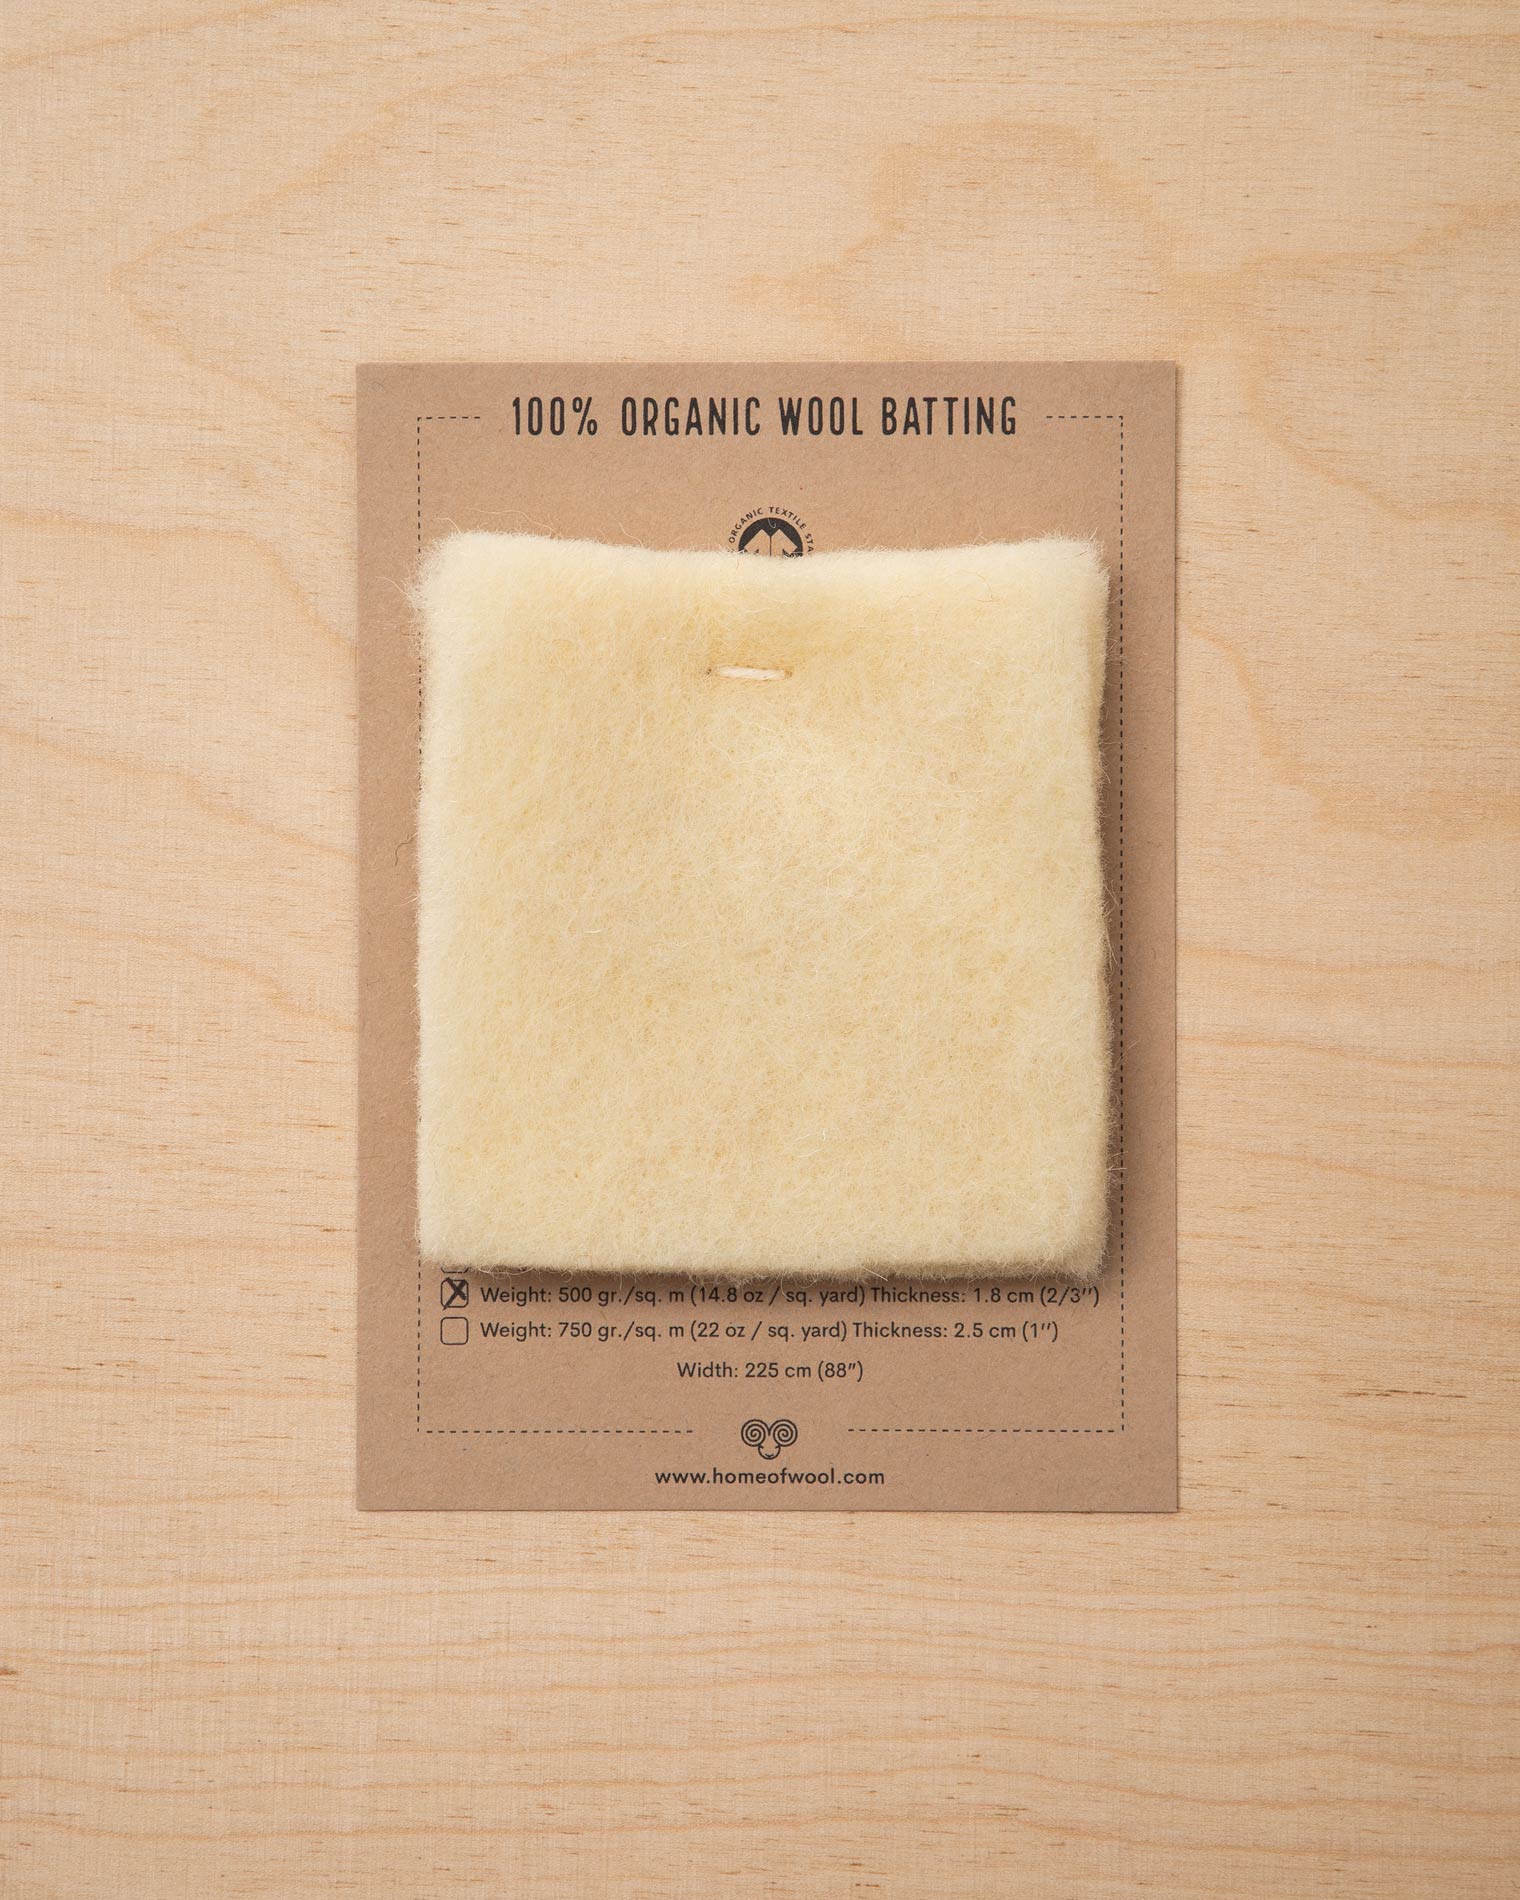
- Wool batting: Naturally temperature-regulating with moisture-wicking properties
- Cotton batting: Breathable and hypoallergenic but requires frequent fluffing
For optimal results, select high-density foam (at least 3 pounds per cubic foot) that won’t compress prematurely. Measure your existing mattress thickness first—most DIY toppers range from 2-4 inches thick for proper support without overwhelming your bed frame.
Selecting the Right Cover Fabric
The cover protects your filling while contributing to breathability and comfort. Match your fabric choice to your climate and sleep habits:
- Cotton sateen: Smooth feel with moderate breathability (ideal for average climates)
- Bamboo-derived rayon: Exceptional moisture-wicking for hot sleepers
- Tencel: Temperature-regulating with silky texture
- Organic cotton: Hypoallergenic option for sensitive skin
- Stretch knit: Accommodates varying thicknesses without bunching
Calculate your fabric requirements by measuring your mattress dimensions plus 8 inches for seam allowances and depth. For a standard queen mattress (60″ x 80″ x 12″), you’ll need approximately 7 yards of 60-inch wide fabric. Always pre-wash natural fibers to prevent future shrinkage.
Precise Measurement and Cutting Techniques
Accurate measurements prevent the most common DIY topper mistakes—gaps at the corners or fabric that won’t secure properly.
Measuring Your Mattress Correctly
Follow these steps for perfect measurements:
- Measure length and width at three points (head, center, foot) since mattresses often vary slightly
- Measure depth from top surface to bottom edge at multiple locations
- Add 6-8 inches to each dimension for seam allowances and tuck-under
- Note any irregular shapes like pillow tops that require special pattern adjustments
For example, if your queen mattress measures 60.5″ x 80.25″ x 14″, round up to 61″ x 81″ and add 7″ for seams, resulting in 68″ x 88″ fabric pieces. This extra material ensures you can securely tuck corners without strain.
Cutting Foam and Fabric Like a Professional
Proper cutting prevents uneven edges that compromise comfort:
- Use an electric carving knife for foam (sawing motion creates cleaner edges than scissors)
- Place foam on a hard, flat surface before cutting
- Mark cutting lines with fabric chalk that won’t stain
- Cut fabric with sharp rotary cutters on self-healing mats
- Always cut foam slightly oversized (1/4 inch) then trim to exact size after assembly
When cutting foam, work in a well-ventilated area and wear a mask to avoid inhaling particles. For curved edges on pillow-top mattresses, create cardboard templates before cutting foam.
Step-by-Step Assembly Process
Follow this professional assembly sequence to create a topper that maintains its shape and comfort for years.
Creating the Foam Core
- Lay your foam on a clean, flat surface
- Smooth out any waves or curves by placing heavy books at intervals
- Allow foam to acclimate 24 hours before cutting (especially if rolled or compressed)
- Cut foam to your calculated dimensions using steady, even pressure
- Sand any rough edges with medium-grit sandpaper for seamless joining
For multi-layer toppers (recommended for adjustable firmness), glue layers together with spray adhesive designed for foam. Allow 24 hours drying time before covering.
Sewing the Professional-Grade Cover
- Cut two identical fabric pieces using your measurements
- Place right sides together and pin around edges
- Sew three sides with 1/2-inch seam allowance using zigzag stitch
- Turn cover right-side out and insert foam
- Hand-stitch the opening closed with ladder stitch for invisible finish
For elasticized corners (essential for deep mattresses), attach 8-inch elastic strips to each corner before sewing three sides. This creates a secure fit that won’t shift during use. Add fabric ties at each corner for extra security if your mattress exceeds 16 inches deep.
Common Mistakes to Avoid in Mattress Topper Construction
Many DIYers compromise their results through preventable errors that affect comfort and longevity.
Foam Selection Errors
- Choosing low-density foam (< 2.5 lbs/cubic foot) that compresses within months
- Using foam that’s too thin (under 2 inches) to make meaningful difference
- Selecting foam incompatible with your sleep position (e.g., firm foam for side sleepers)
- Ignoring CertiPUR-US certification for chemical safety
Construction Problems
- Inadequate seam allowances causing fabric tearing
- Using straight stitch instead of zigzag on stretch fabrics
- Skipping the acclimation period for compressed foam
- Not adding corner elastics for deep mattresses
- Using inappropriate thread weight (use 40-50 weight for most fabrics)
Maintenance and Longevity Tips
Proper care extends your DIY topper’s life significantly compared to store-bought versions.
Cleaning and Refreshing Your Topper
- Vacuum monthly to remove dust mites and debris
- Spot clean stains immediately with mild detergent
- Air out in sunlight quarterly to eliminate moisture
- Rotate regularly to prevent uneven wear
- Use a waterproof mattress protector as a barrier
For memory foam toppers, never saturate with water—excess moisture causes permanent damage. Instead, use a lightly damp cloth for spot cleaning followed by thorough air drying.
When to Replace Your DIY Topper
Watch for these signs it’s time for a new topper:
– Visible indentations deeper than 1.5 inches
– Foam that no longer regains shape within 30 seconds
– Persistent body impressions affecting sleep quality
– Fabric cover that’s stretched or torn beyond repair
– Unpleasant odors that won’t dissipate
Most well-constructed DIY toppers last 3-5 years with proper care—significantly longer than many store-bought versions that use inferior materials.
Cost Comparison: DIY vs. Store-Bought

Creating your own topper typically costs 40-60% less than comparable retail options:
| Component | DIY Cost | Retail Equivalent | Savings |
|---|---|---|---|
| 3″ Memory Foam (Queen) | $120-$180 | $250-$400 | 50-55% |
| Bamboo Cover | $45-$65 | $90-$130 | 50% |
| Labor | Your time | Included in price | – |
| Total | $165-$245 | $340-$530 | 50% |
The DIY approach also lets you upgrade specific components—like choosing organic cotton instead of standard polyester—without the premium retail markup.
Customization Options for Personalized Comfort
Tailor your topper to address specific sleep issues:
- For back pain: Add 1-inch layer of softer memory foam over firmer base
- For hot sleepers: Insert wool batting layer between foam and cover
- For couples with different needs: Create dual-firmness topper with zippers
- For allergy sufferers: Use organic cotton and natural latex throughout
Consider adding fabric handles to each side for easier rotation, or integrate cooling gel pods in strategic areas for temperature regulation.
Creating your own mattress topper puts you in control of materials, comfort, and cost. By following these precise instructions and avoiding common pitfalls, you’ll craft a customized sleep surface that rivals expensive retail options while perfectly matching your individual needs. The initial investment of time pays dividends through better sleep, extended mattress life, and the satisfaction of a job well done. Start measuring tonight and you could be sleeping on your custom creation within a week.


