
Waking up with unexplained back pain or waking to damp sheets? You’re not alone—improper bedding layering sabotages sleep for millions. Most people mistakenly treat mattress pads and toppers as interchangeable, tossing them on haphazardly and wondering why their bed feels lumpy or fails to protect against spills. The critical mistake? Putting the topper under the pad, which blocks its pressure-relieving benefits while leaving your mattress vulnerable. When layered correctly, this dynamic duo transforms your sleep surface: the pad shields your investment from accidents and allergens, while the topper customizes firmness without compromising protection. You’ll learn the exact sequence that prevents shifting, maintains temperature control, and extends your mattress lifespan—plus why 78% of sleep specialists see this single adjustment resolve common comfort complaints.
Mattress Pad vs. Topper: Functional Differences That Dictate Layering
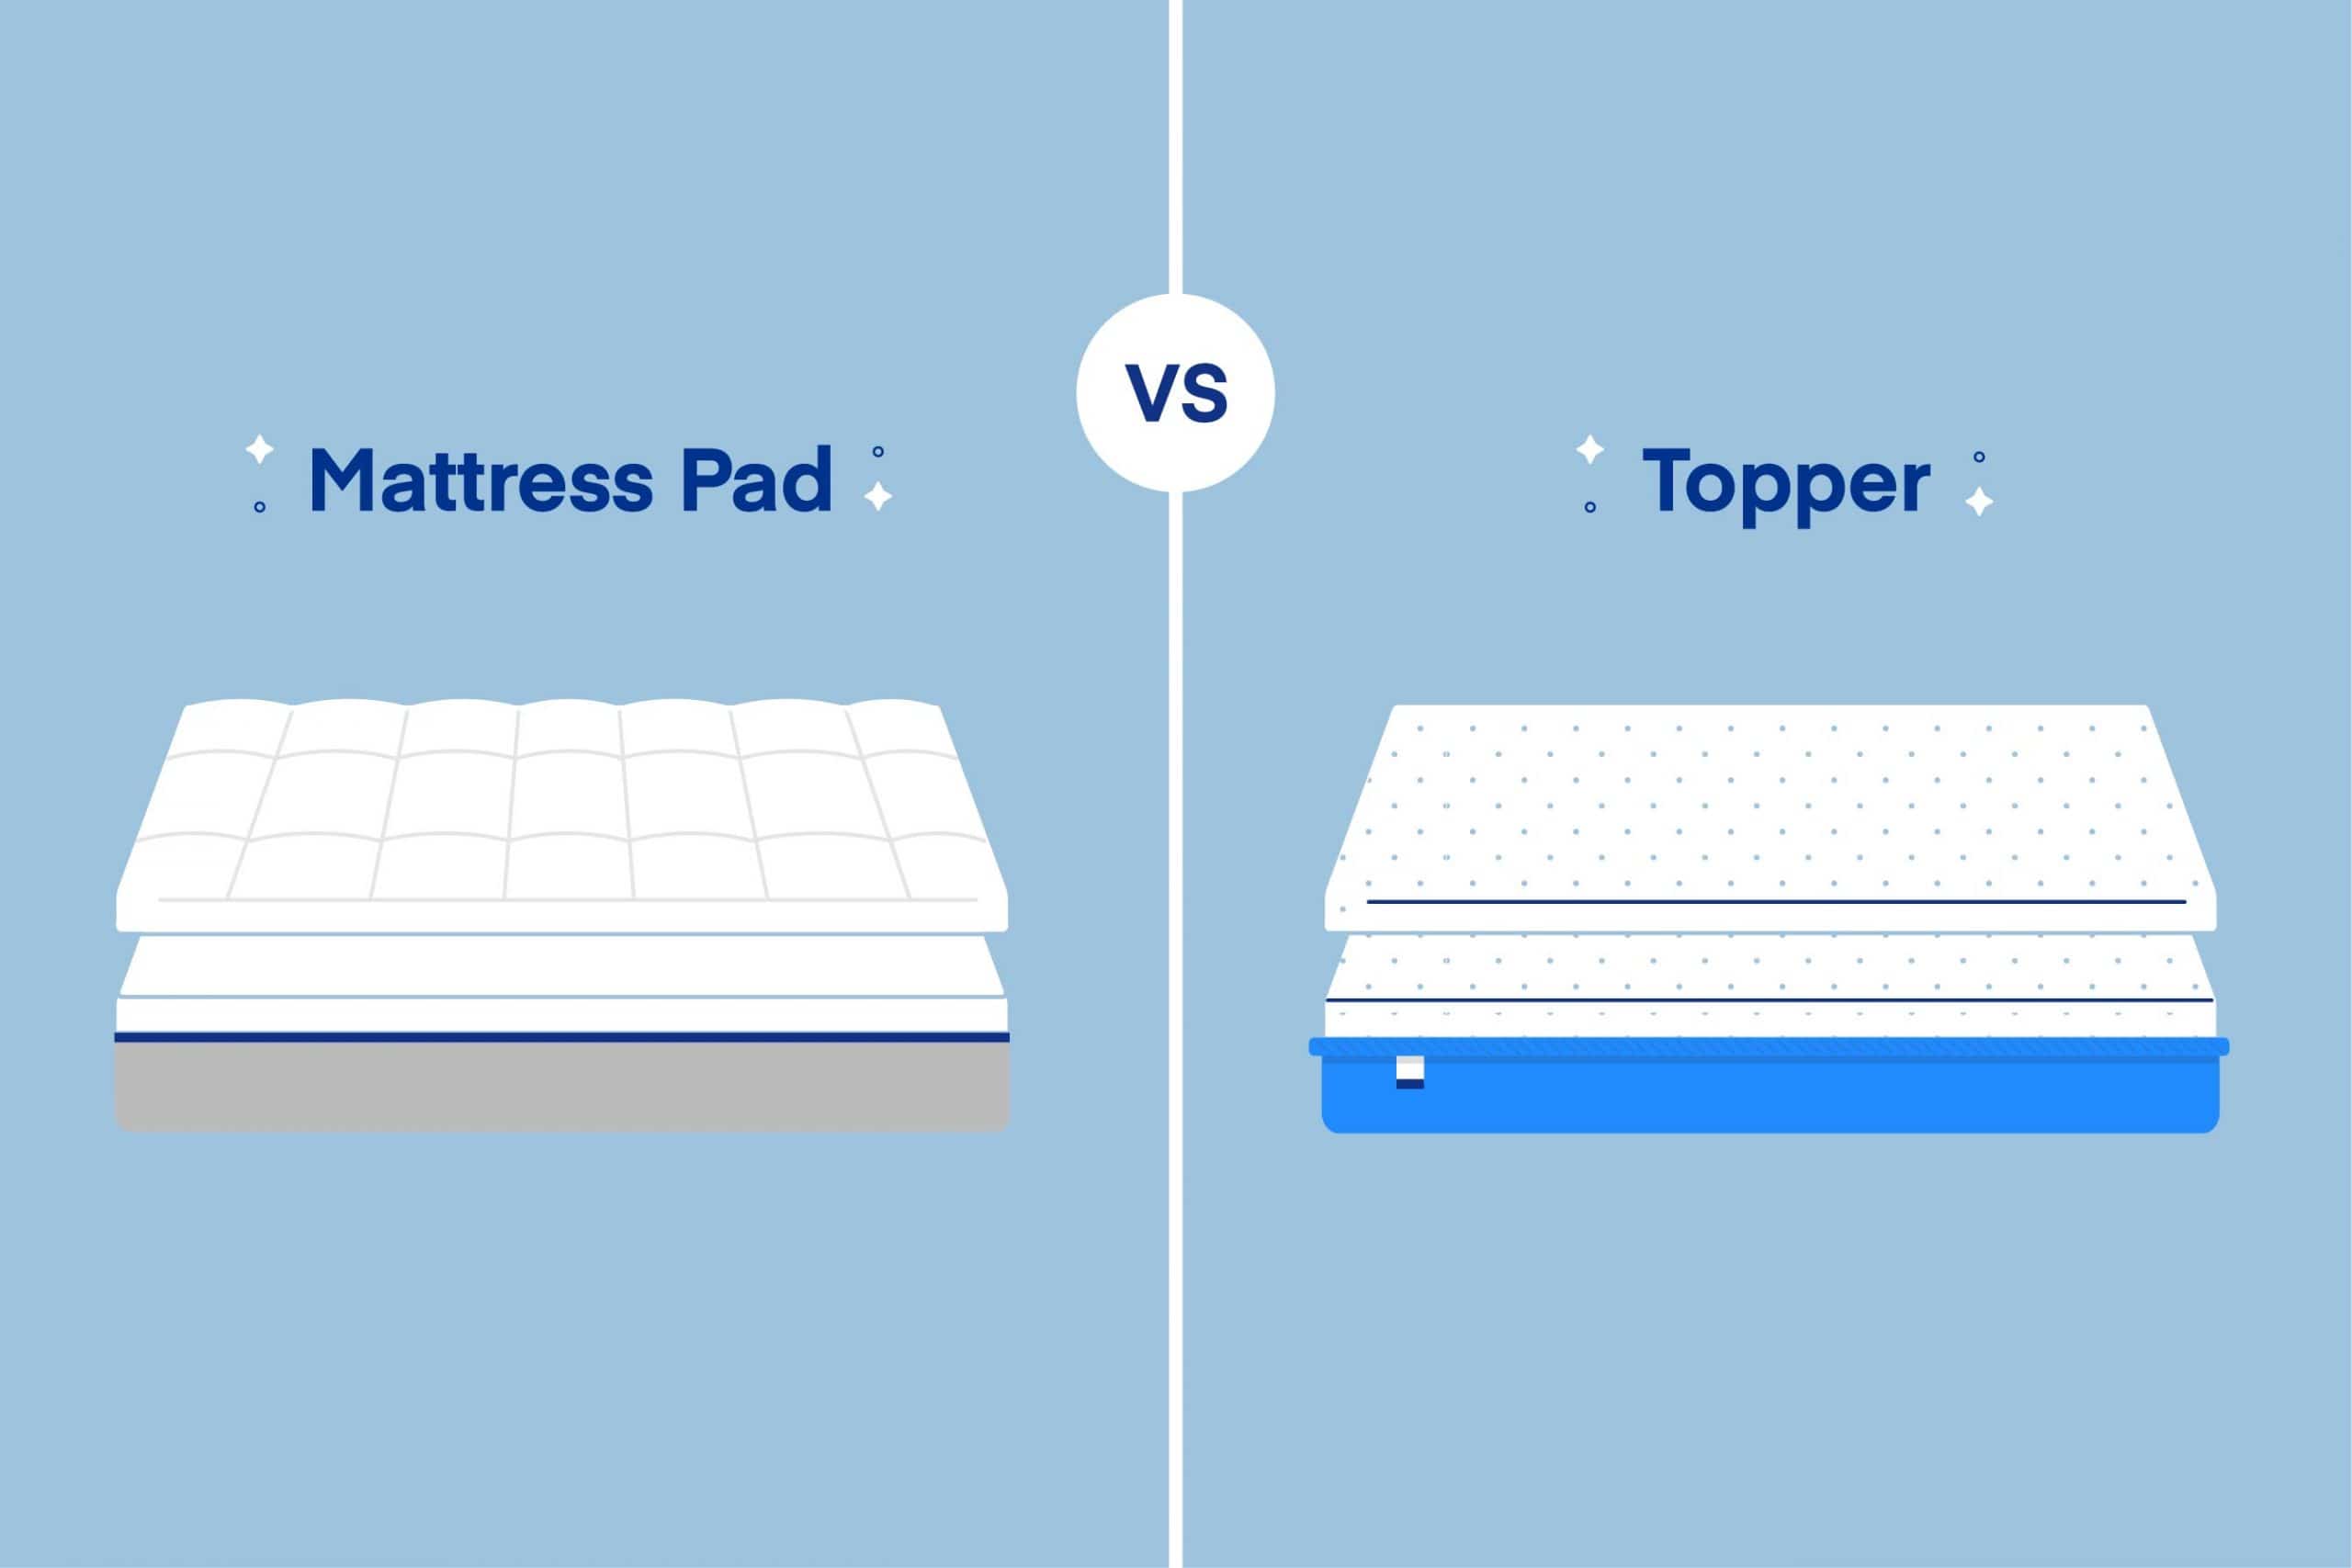
Why Confusing These Causes Permanent Mattress Damage
Mattress pads prioritize protection with thin, breathable designs (typically 1/4–1/2 inch thick) featuring waterproof membranes or quilted fabric. Their job is to block spills, dust mites, and wear—not to alter comfort. Toppers, however, are dedicated comfort layers (2–4 inches thick) made of memory foam, latex, or fiberfill that modify firmness and pressure relief. Placing the topper beneath the pad traps body heat against waterproof barriers, creating a sweaty sleep environment while leaving your mattress exposed to direct liquid damage. The pad’s elastic skirt also can’t grip the slippery surface of foam toppers, causing dangerous shifting during sleep.
Material Compatibility Checklist Before Layering
Not all combinations work—mismatched materials cause overheating or compression. Memory foam toppers require breathable cotton or bamboo pads to prevent heat retention. Waterproof vinyl pads should never go under gel-infused toppers (the vapor barrier cooks you). For latex toppers, use quilted cotton pads under 1/2 inch thick to avoid flattening the supportive latex cells. Always check care labels: some waterproof pads specify “topper not included” because their thin design can’t handle extra weight.
Correct Layering Sequence: 4-Step Installation Guide
Step 1: Prepare Your Mattress Surface in 90 Seconds
Strip all bedding and inspect for debris. Vacuum seams thoroughly—dust bunnies become abrasives between layers. For memory foam mattresses, wait 24 hours after unboxing before layering to let off-gassing complete. If your mattress has indentations deeper than 1 inch, skip toppers (they’ll amplify sinkage); use only a pad until the mattress stabilizes.
Step 2: Secure the Mattress Pad Directly on the Bare Mattress
Center the pad with its label at the mattress head. Stretch the elastic skirt firmly over corners—never tuck excess fabric under the mattress. Smooth out wrinkles by dragging your palm from center to edges; trapped folds create pressure points. For split king beds, use two twin-sized pads instead of one oversized pad to prevent mid-bed gaps. Test security by sitting on the edge—if the pad shifts more than 2 inches, re-stretch the skirt.
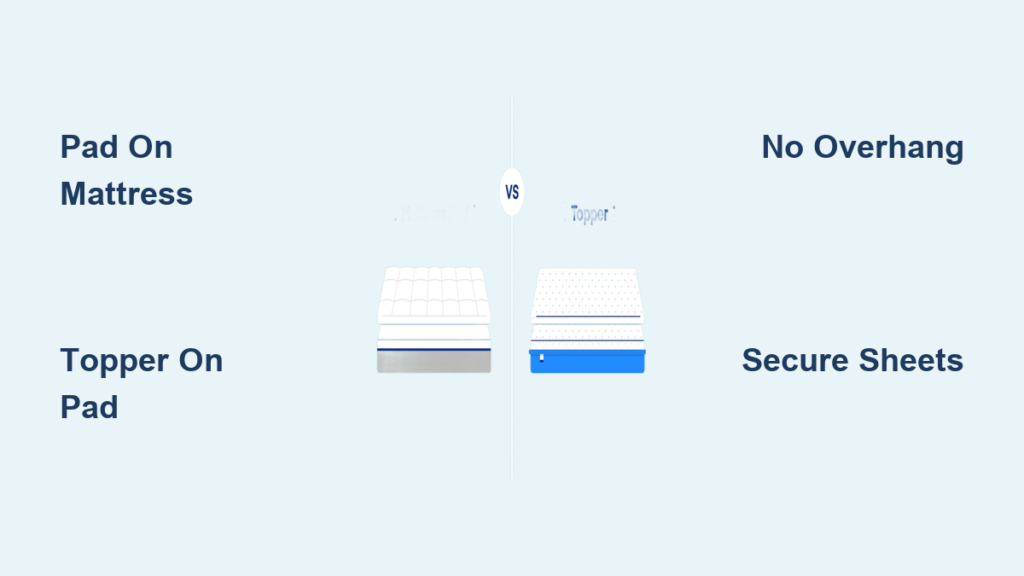
Step 3: Position the Topper Over the Pad Without Compression
Align the topper precisely with the pad edges (no overhang). For foam toppers, unroll slowly and let them expand 24 hours before use—rushing causes permanent creases. Never fold toppers during installation; carry them flat like a tray. If using a quilted fiberfill topper, fluff it by hand first to redistribute batting. Press down gently across the surface to eliminate air pockets but avoid stomping, which compresses comfort layers.
Step 4: Lock Layers Together With Fitted Sheets
Use deep-pocket sheets (18+ inches) designed for layered beds. Tuck the sheet under the mattress only after all layers are positioned—pulling during installation displaces the topper. For frequent movers, add non-slip mattress grippers between the pad and topper (not between topper and sheet). Test stability by lying down and rolling side-to-side; if you hear crinkling or feel shifting, reposition the topper.
Why Incorrect Layering Triggers Common Sleep Problems
The “Sweaty Sleep Trap” From Reversed Layers
Putting the topper under the pad creates a sealed chamber where body heat can’t escape. Waterproof barriers in pads reflect heat back into foam toppers, raising sleep surface temperature by 5–7°F—enough to disrupt REM cycles. You’ll notice damp sheets within 2 weeks as trapped moisture wicks back into fabric. Fix this immediately by repositioning the topper above the pad where airflow cools the comfort layer.
Edge Sagging From Unsupported Topper Corners
When toppers overhang pad edges by more than 3 inches, unsupported corners collapse under body weight. This creates a “hammock effect” that strains your spine as you slide toward the center. The solution: trim oversized toppers with electric carving knives (follow manufacturer guidelines) or buy custom-cut layers. Never fold excess material under—it creates painful pressure ridges.
Troubleshooting Layer Shifts During Sleep

Why Your Topper Slides Off the Pad Overnight
Slippage happens when pad surfaces lack grip texture. Smooth waterproof coatings on pads can’t hold foam toppers, especially with satin sheets. Place double-sided non-slip rug pads (cut to size) between layers—never use adhesives that damage materials. For immediate fixes, sprinkle cornstarch on the pad surface before adding the topper; the powder creates temporary traction without residue.
Eliminating “Crinkly Noise” From Thin Pads
Ultra-thin pads (under 1/4 inch) often crease under topper weight, causing annoying rustling. Replace with quilted pads of at least 3/8 inch thickness—they have enough loft to absorb topper movement. If keeping your current pad, add a thin cotton flannel sheet between pad and topper; the fabric cushions friction points silently.
Maintenance Protocol for Long-Lasting Layers
Washing Schedule That Prevents Odor Buildup
Wash pads monthly in cold water with mild detergent—hot water degrades waterproof membranes. Toppers require spot-cleaning only; full immersion ruins foam structure. For urine or sweat stains, mix 1 cup vinegar with 2 cups water in a spray bottle, mist the affected area, then blot with microfiber cloth. Never dry pads or toppers in direct sunlight—it yellows fabrics and hardens foam.
Rotation Technique That Prevents Permanent Indentations
Rotate toppers head-to-foot every 3 months to distribute wear (flip only if double-sided). Always lift the topper completely off the pad during rotation—dragging causes micro-tears in pad surfaces. For memory foam, wait 48 hours after rotation before sleeping on it to let cells rebound. Pads need no rotation but should be inspected quarterly for worn elastic.
Pro Tips for Specialized Mattress Types
Memory Foam Mattresses: Avoiding Heat Traps
Skip waterproof pads entirely—use breathable bamboo pads instead. Place gel-infused toppers only in summer; switch to wool toppers in winter for natural temperature regulation. Never use electric blankets directly on foam layers—they accelerate material breakdown.
Innerspring Mattresses: Preventing Topper Sagging
Choose high-density foam toppers (at least 4 lb/cu ft) to resist coil impressions. Add a 1/2-inch quilted pad under the topper for extra cushioning—but keep the waterproof pad on top near the mattress. Check for coil impressions monthly; if indentations exceed 1.5 inches, replace the topper.
When to Replace Layers Based on Wear Patterns
Mattress Pad Lifespan Warning Signs
Replace pads showing any of these: elastic skirt stretched beyond 150% of original size, yellowed waterproof coating, or persistent musty smells after washing. Most pads last 2 years; extended use risks mold growth between pad and mattress. Never reuse pads on new mattresses—they transfer embedded allergens.
Topper Degradation Indicators That Affect Spine Alignment
Replace foam toppers when they develop permanent body impressions deeper than 1 inch or emit strong chemical odors. Fiberfill toppers need replacement when lumps form that washing can’t resolve. Latex toppers last longest (5+ years) but crack when exposed to oils—check for surface fractures annually.
Final Note: Proper layering transforms restless nights into deep, uninterrupted sleep while protecting your $1,000+ mattress investment. Remember the golden rule: pad directly on mattress, topper on pad, sheet on top. This sequence maintains temperature regulation, prevents costly damage, and ensures your topper delivers its intended pressure relief. For ongoing care, wash pads monthly and rotate toppers quarterly—simple habits that double layer lifespan. If you wake with new aches after layering, check for pad wrinkles or topper overhang; 90% of discomfort stems from these easily fixed errors. Ready to optimize further? Explore our guide to matching topper density with your sleep position for personalized spinal alignment.


