
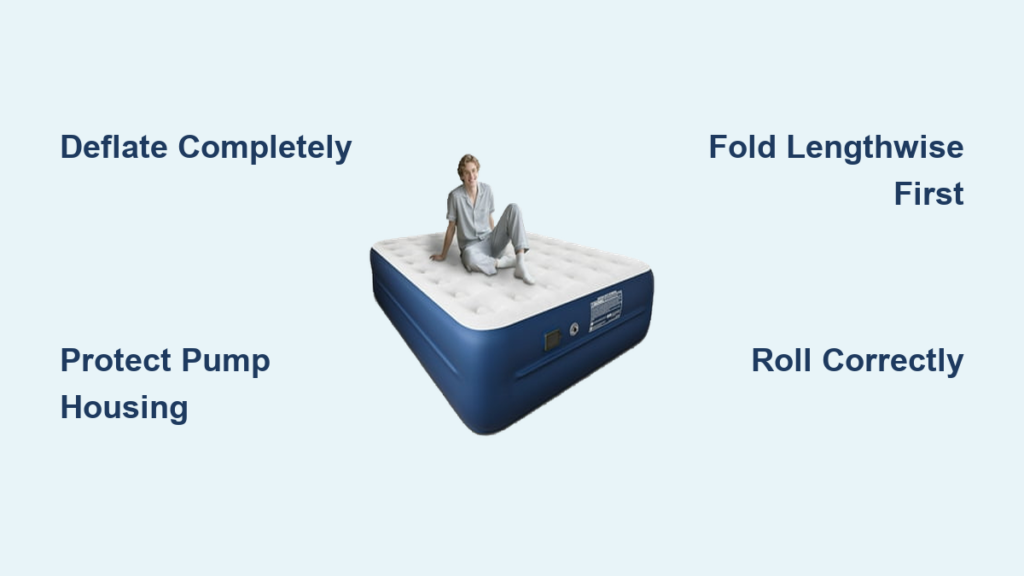
Your air mattress with built-in pump has been a lifesaver for guests and camping trips, but now you’re staring at a deflated mess after inflating it with the push of a button. Folding it correctly matters more than you think—improper folding damages the integrated pump assembly, creates stubborn air pockets, and turns compact storage into an impossible challenge. Unlike standard air mattresses that tolerate rough handling, built-in pump models demand strategic folding to protect their electrical components while achieving that neat, manageable package. This complete guide reveals exactly how to fold your specific mattress model properly, avoiding the most common mistakes that render pumps useless and seams leaky.
The difference between a perfectly folded mattress and a frustrating mess comes down to understanding where your pump sits and planning folds around it. One misplaced crease over the pump housing can pinch internal wires or crack circuit boards, leaving you with a mattress that won’t inflate next time. By following these precise techniques, you’ll transform your bulky mattress into a compact bundle ready for closet storage or travel, while protecting your investment for years of reliable use.
Choose the Right Surface Before Folding Begins
Your folding success starts with selecting the proper workspace—ignoring this step leads to uneven folds, trapped air pockets, and potential damage to the vinyl material. The surface you choose directly impacts how smoothly the folding process goes and whether your final package stays compact.
Clear Sufficient Space for Queen and King Sizes
Queen and king-sized air mattresses need significantly more room than you’d expect—give yourself at least 3-4 feet of clearance on all sides beyond the mattress’s fully deflated dimensions. Attempting to fold in cramped quarters forces rushed movements that create uneven folds and trapped air. Hardwood or tile floors work acceptably if you place a clean blanket underneath to prevent sliding, but carpeted surfaces provide ideal traction that keeps the deflated material stationary during folding.
Critical mistake to avoid: Folding against a wall or furniture restricts your movement and creates lopsided folds that prevent proper air evacuation. You need full access to all edges to apply even pressure and maintain straight fold lines.
Remove All Potential Punctures from Workspace
Before laying out your deflated mattress, conduct a thorough sweep of your folding area for hidden hazards. Run your hands across the surface to detect small debris like pet hair, dust bunnies, or tiny pebbles that could embed in the vinyl during folding. These seemingly harmless particles become dangerous when compressed—during inflation, they can puncture the material from within, creating slow leaks that develop over time.
For outdoor folding, inspect the ground for sticks, rocks, or sharp grass stems that could damage the bottom surface. If you find any potential hazards, clean the area thoroughly or choose an alternative location. This 60-second precaution prevents costly damage that might not show up until your next use.
Deflate Your Mattress Completely Using Proven Techniques
Half-deflated mattresses resist neat folding and create stubborn air pockets that compromise storage compactness. Proper deflation requires more than just opening the valve—strategic pressure application ensures every air pocket escapes, creating the flat, limp surface essential for clean folds.
Activate Reverse Pump Function Before Manual Pressure
Most built-in pump models include a reverse function specifically designed to draw air out faster than passive deflation. Locate the deflation button (often labeled with an arrow pointing downward) and activate it for 30-60 seconds before applying any manual pressure. This step pulls air from hard-to-reach corners and along seams where passive deflation leaves trapped pockets.
After using the reverse pump function, apply your body weight strategically: start at the center of the mattress and work outward toward the edges, using slow, deliberate pressure. For queen and king sizes, lie across the surface and shift your weight systematically rather than jumping around randomly. This methodical approach pushes air toward the valve without creating new pockets elsewhere.
Perform the Air Pocket Detection Test
Don’t assume your mattress is fully deflated just because it appears flat. Run your hands across the entire surface, pressing firmly in a grid pattern to detect any remaining air pockets. Pay special attention to corners, edges, and the pump housing area—these spots commonly trap air due to their structural design.
If you find any pockets, apply localized pressure directly over them while keeping the valve fully open. Allow the mattress to rest in this state for 5 minutes before attempting to fold—it takes time for stubborn air to migrate toward the valve. Skipping this rest period guarantees trapped air that will fight against your folds.
Position the Pump Assembly for Maximum Protection

The pump’s location dictates your entire folding strategy—you must identify its position first and plan folds around it rather than through it. Built-in pumps typically sit along one side edge or at a corner, integrated into the mattress housing with visible controls and power ports.
Identify Your Specific Pump Location
Examine your mattress carefully to pinpoint exactly where the pump assembly sits. Most models have a slightly raised section containing buttons, indicator lights, and the power cord storage compartment. Trace your fingers along this housing to understand its full dimensions—you’ll need this knowledge to avoid folding directly over sensitive components.
For models where the pump spans the full width of one end, you’ll need a different folding approach than for corner-mounted pumps. This distinction determines whether you should fold lengthwise first or start with horizontal folds—getting it wrong stresses the pump housing unnecessarily.
Create Buffer Zones Around the Pump Housing
When folding, maintain at least 2-3 inches of clearance around the entire pump assembly. Never create a fold line that crosses directly over any part of the pump housing—these sharp creases can crack internal components even if the exterior appears undamaged. Instead, position folds to run parallel to the pump housing or stop just short of it.
For corner-mounted pumps, fold the opposite corner first and work toward the pump end. For side-mounted pumps, begin folding from the end farthest from the pump and work toward it. This strategic sequencing keeps the pump area as the last section to fold, minimizing stress on the assembly.
Fold Lengthwise Before Creating Horizontal Sections
The sequence of folds matters as much as the folds themselves—starting with a lengthwise fold creates the foundation for maximum compactness while protecting the pump assembly from unnecessary stress. This technique works for all standard sizes from twin to king.
Execute the Perfect Lengthwise Fold
Bring one long edge to meet the opposite edge, aligning them precisely along the entire length. Work from one end to the other, smoothing the material ahead of your fold line to prevent wrinkles and bunching. Your goal is a uniformly thick fold where material lies flat without tension—any pulling or stretching indicates improper alignment.
For queen and king sizes, you may need a second person to help hold one edge steady while you smooth and fold the other side. Attempting this fold solo often results in uneven alignment that creates lumps in the final package. If working alone, secure one edge with heavy books before folding the opposite side.
Add Strategic Horizontal Folds in Sequence
After completing the lengthwise fold, create horizontal folds working from the foot toward the head of the mattress. This accordion-style folding produces multiple stacked sections that reduce the overall footprint significantly. Start with a fold approximately one-third of the way from the foot end, then create another fold of similar size over the first.
Each horizontal fold should be identical in size for maximum compactness—uneven sections create bulges that prevent tight packing. As you fold each section, push out any remaining air pockets with firm pressure. For mattresses with side-mounted pumps, stop folding approximately 4 inches before reaching the pump housing to avoid compressing it.
Roll Tightly Only When Pump Is Positioned Correctly
Rolling produces a more compact package than folding alone, but only when executed with the pump assembly properly positioned. Incorrect rolling technique damages the pump housing while creating an unstable cylinder that unwinds during storage.
Start Rolling from the End Opposite the Pump
Begin your roll at the end of the mattress farthest from the pump assembly, applying even pressure across the width as you roll toward the pump end. Maintain consistent tension throughout—too loose creates air pockets, while excessive force strains seams and the pump housing. Your goal is a firm, uniform cylinder with no visible gaps between layers.
As you approach the pump end, stop rolling approximately 2-3 inches before reaching the housing. This leaves the pump exposed on the outer surface of the roll where it won’t bear any pressure from storage items. Never roll the pump assembly itself into the cylinder—this concentrates damaging pressure on sensitive components.
Secure the Roll Without Compressing the Pump
Use the mattress’s built-in straps (if available) to secure the roll, positioning them away from the pump area whenever possible. For mattresses without integrated straps, use wide fabric belts rather than thin cords that can dig into the material. Tighten straps just enough to maintain the roll shape—over-tightening stresses the pump housing even when positioned correctly.
If straps must cross near the pump area, place folded cardboard or foam padding between the strap and the pump housing to distribute pressure. This simple precaution prevents strap marks from developing into cracks over time.
Store Your Folded Mattress in Climate-Controlled Conditions
Proper storage completes the folding process—improper conditions undo all your careful work by degrading materials and damaging the pump assembly over time. Temperature and humidity fluctuations pose the greatest threats to long-term mattress health.
Maintain Ideal Storage Temperature Range
Store your folded mattress in an environment between 50-75°F (10-24°C)—extreme temperatures accelerate material degradation. Avoid attics, garages, and unheated storage units where temperatures regularly exceed 90°F or drop below freezing. These environments make vinyl brittle and prone to cracking while damaging the pump’s electronic components.
If storing in potentially extreme conditions is unavoidable, place the folded mattress inside an airtight plastic storage bin with silica gel packets to moderate temperature swings and absorb moisture. Check the container periodically for condensation that could indicate humidity problems.
Position the Pump Facing Upward in Storage
Always store your folded or rolled mattress with the pump assembly facing upward, never compressed beneath other items or against storage surfaces. This orientation prevents sustained pressure on the housing that can crack internal components over time. For rolled mattresses, ensure the pump sits at the top of the roll where nothing can rest against it.
If storing vertically (standing on end), position the mattress so the pump faces outward rather than against the wall. This prevents accidental bumps from damaging the housing and allows for better air circulation around the assembly.
Perform Quarterly Maintenance to Extend Lifespan
Your mattress needs periodic attention even during storage—neglecting this simple maintenance creates problems that folding technique alone can’t fix. These quick checks prevent small issues from becoming major failures.
Inflate Monthly to Check for Developing Issues
Every 30 days, fully inflate your mattress and let it sit for 4-6 hours before deflating again. This practice serves three critical purposes: it identifies slow leaks before they become major problems, maintains material flexibility, and ensures your pump remains functional. During inflation, inspect the entire surface for developing issues like weak seams or valve problems.
Pay special attention to the pump housing area during inflation—listen for unusual noises or watch for warning lights that indicate developing electrical issues. Catching these problems early prevents complete pump failure that would require expensive repairs or replacement.
Clean Thoroughly After Each Use Before Folding
Wipe down both top and bottom surfaces with a mild soap solution after every use, paying special attention to areas that contacted sleepers. Body oils and dead skin cells degrade vinyl over time, creating weak spots that develop into leaks. Never store a damp mattress—allow it to air dry completely before deflation and folding.
For stubborn stains, use a soft-bristled toothbrush with diluted vinegar solution rather than abrasive cleaners that damage the protective coating. Avoid bleach or ammonia-based products that break down vinyl material. Proper cleaning after each use extends your mattress’s usable life by years.
By following these precise folding techniques and maintenance practices, your air mattress with built-in pump will deliver reliable performance for countless uses. The investment you make in proper folding today prevents costly replacements tomorrow while ensuring your mattress remains ready for unexpected guests or spontaneous camping trips. Take the extra few minutes to fold correctly—you’ll thank yourself when your mattress inflates perfectly months later with no mysterious leaks or pump failures.


