
When your Aerobed mattress develops a leak in the middle of camping trip or during a guest’s overnight stay, you need reliable solutions fast. That slow hiss of escaping air means your comfortable sleeping surface will gradually deflate, leaving you or your guests without proper bedding. Knowing how to properly fix a hole in an Aerobed mattress can save your trip, prevent wasted money on premature replacement, and extend the life of your investment. This guide provides actionable repair methods based on standard air mattress repair principles that apply to Aerobed models.
How to Locate the Exact Leak Source in Your Aerobed

Before attempting any repair, you must pinpoint the precise location of the hole. Guessing or applying patches randomly leads to failed repairs and continued air loss.
Using Soapy Water to Find Invisible Leaks
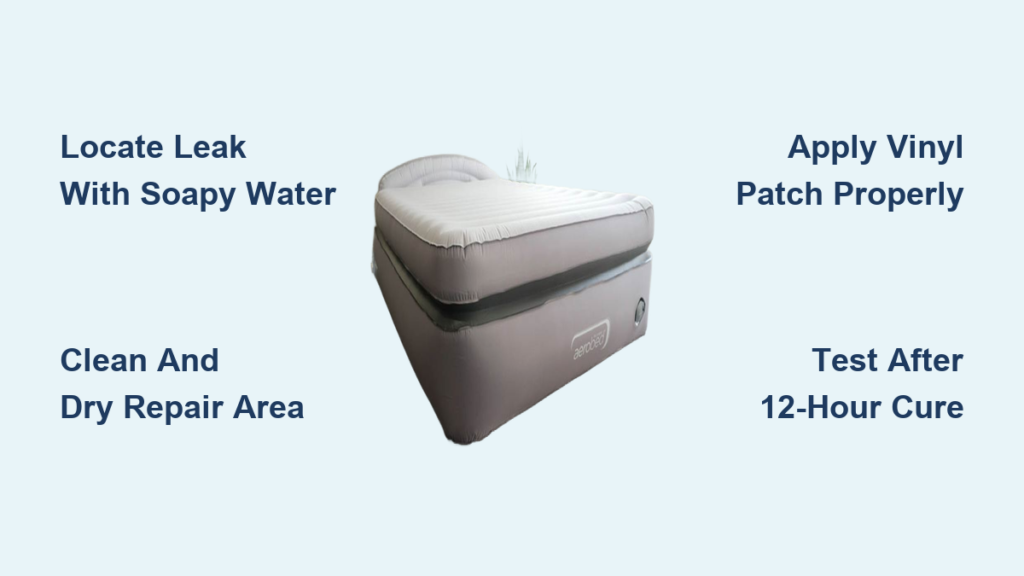
Fill a spray bottle with water and a few drops of dish soap. Fully inflate your Aerobed mattress and begin spraying the soapy solution across the surface. Watch for bubbles forming at the leak site—this technique works for both pinprick holes and larger tears. Pay special attention to seams, valve areas, and any sections showing visible wear. For underwater testing (if possible with your setup), submerge inflated sections in a bathtub to see where bubbles emerge.
Listening and Feeling Techniques for Obvious Air Loss
Turn off surrounding noise and place your ear close to the mattress surface. Listen for the distinct hissing sound of escaping air. Run your hand slowly over the surface to feel for air movement—this works best for larger leaks. Mark the exact spot with a washable marker once located, as leaks can be difficult to relocate after deflation.
Preparing the Damaged Area for Effective Repair
Proper surface preparation determines whether your repair will hold long-term or fail within days. Rushing this step causes most DIY repair failures.
Cleaning and Drying the Repair Zone Thoroughly
Wipe the area around the leak with rubbing alcohol on a clean cloth to remove oils, dirt, and moisture. Allow the surface to dry completely—any contamination prevents proper adhesion. For best results, let the cleaned area air dry for at least 20 minutes in a warm room. Never attempt repairs on damp or dirty surfaces, as patches will peel off prematurely.
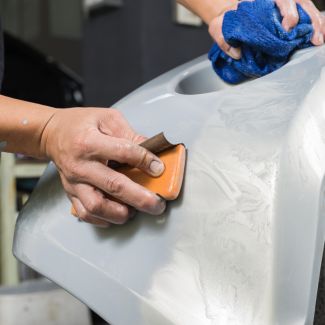
Roughening the Surface for Maximum Adhesion
Gently sand the repair area with fine-grit sandpaper to create a slightly textured surface. This increases the contact area for adhesives to grip the vinyl material. Wipe away any dust particles after sanding, then clean again with alcohol before applying your patch or adhesive. Proper surface preparation doubles the longevity of your repair.
Selecting the Right Repair Method for Your Aerobed Damage
Different hole sizes and locations require specific repair approaches. Using the wrong method leads to temporary fixes that fail quickly.
Using Official Aerobed Repair Kits for Small to Medium Holes
Aerobed typically includes a repair kit with new mattresses featuring pre-cut patches and adhesive. If you have this kit available, it’s specifically formulated for Aerobed’s materials. Clean the area thoroughly, apply adhesive to both the patch and mattress surface, wait for tackiness, then press firmly for two minutes. This method works best for holes under 1 inch in diameter.
Applying Heavy-Duty Vinyl Patches for Larger Tears
For tears exceeding 1 inch or multiple close-together holes, use heavy-duty vinyl repair patches from outdoor or pool supply stores. Cut the patch at least 1.5 inches larger than the damaged area on all sides. Apply a thin, even layer of vinyl-specific adhesive to both surfaces, wait for the recommended drying time (usually 5-10 minutes), then press the patch firmly into place with even pressure for three minutes.
Step-by-Step Permanent Repair Process
Follow this precise sequence to ensure your repair lasts through multiple inflations and deflations.
Applying Adhesive Properly for Maximum Bond Strength
Use a small brush or applicator stick to spread adhesive in a thin, even layer over the entire repair area—extend at least 1 inch beyond the damaged zone. Apply adhesive to both the mattress surface and patch material. Allow the adhesive to become tacky (not wet) before joining surfaces, typically 5-15 minutes depending on temperature and humidity. This waiting period activates the adhesive’s strongest bonding properties.
Securing the Patch with Proper Pressure and Cure Time
Press the patch firmly onto the prepared surface, starting from the center and working outward to eliminate air bubbles. Apply consistent pressure for at least three minutes using a roller or your hands. Place heavy books or weights on the repair area while curing. Allow the repair to cure completely—minimum 12 hours at room temperature—before inflating. Rushing the cure time causes the patch to lift during first use.
Testing Your Aerobed Repair for Complete Success
Never assume your repair worked without thorough testing—many failures happen because users skip this critical verification step.
Conducting Multiple Inflation Tests Before Relying on the Repair
Inflate your Aerobed mattress fully and let it sit for 24 hours before testing. Check for air loss by listening closely and feeling for airflow. Repeat the soapy water test over the repair site to confirm no bubbles form. Deflate and reinflate the mattress two more times, checking after each cycle. Only consider the repair successful if the mattress holds air through three complete inflation-deflation cycles.
Identifying and Fixing Incomplete Repairs
If air continues escaping, deflate the mattress and examine the patch edges for lifting. Clean the area again with alcohol, apply additional adhesive under lifted edges, and re-press firmly. For persistent leaks, apply a second patch overlapping the first by at least half an inch. Some complex repairs require two complete repair attempts to achieve permanent results.
When to Replace Your Aerobed Instead of Repairing
Not all damage can be successfully repaired, and knowing when to replace prevents wasted time and frustration.
Assessing Damage That Exceeds Repair Capabilities
Certain damage patterns indicate replacement is necessary: extensive punctures across multiple areas, large tears near seams, or damage to the internal air chambers. If the mattress loses air rapidly (deflating within hours), the structural integrity is likely compromised beyond reliable repair. Multiple failed repair attempts also signal it’s time for a new mattress.
Considering Cost-Benefit Analysis of Repair vs. Replacement
Calculate whether repair makes financial sense—factor in your time, cost of materials, and expected remaining lifespan. For older Aerobeds (over 3 years), replacement often proves more economical than repeated repairs. Newer models with minor damage typically benefit from proper repair. Weigh the inconvenience of potential future failures against the cost of a new mattress.
Preventing Future Holes in Your Aerobed Mattress
Implement these protective measures to significantly extend your Aerobed’s lifespan and avoid repeat repairs.
Proper Surface Protection and Setup Practices
Always place a ground tarp or blanket beneath your Aerobed when camping to prevent punctures from sharp objects. Remove all sharp items from sleeping areas, including belt buckles and jewelry. Use a dedicated mattress cover to protect against abrasion and accidental punctures during use. Never set up directly on rocky or debris-covered surfaces without proper padding.
Careful Storage and Handling Techniques
Deflate your Aerobed completely before storage, rolling it loosely rather than folding to prevent stress cracks. Store in a cool, dry place away from direct sunlight which degrades vinyl over time. Keep the mattress in its original storage bag or a breathable cotton sack—never in plastic which can trap moisture. Check periodically during storage for signs of material degradation.
Final Note: A properly executed repair can restore your Aerobed mattress to full functionality for months or even years of additional use. By following these precise methods for locating leaks, preparing surfaces, applying patches correctly, and testing thoroughly, you’ll achieve reliable results that save money and prevent camping trip disasters. Remember that patience during the preparation and curing stages makes the critical difference between a temporary fix and a permanent solution. For extensive damage or repeated failures, consult Aerobed’s warranty information or consider replacement to ensure comfortable, reliable sleep during your adventures.


