
Waking up to find milk soaking into your mattress creates that sinking feeling of dread. One moment you’re enjoying breakfast in bed or comforting a child, the next you’re staring at a spreading white puddle that threatens to become a permanent problem. The good news is that milk spills, while frustrating, are entirely manageable when you know exactly what to do. Acting quickly with the right techniques can save your mattress from stains, odors, and potential damage.
Milk presents unique challenges compared to other liquid spills because it contains proteins, fats, and sugars that interact with mattress materials in ways plain water does not. These components break down rapidly, creating that unmistakable sour smell within hours if the spill isn’t properly treated. The liquid seeps deep into foam layers, padding, and sometimes even reaches inner springs, making thorough cleaning essential rather than optional.
This guide walks you through every step of the milk cleanup process, from immediate first response to long-term prevention strategies. You’ll learn exactly which supplies to use, how to tackle both fresh and dried spills, and what to do when odors persist. By the end, you’ll have a complete action plan for rescuing your mattress from milk damage.
Why Milk Spills Damage Mattresses
Milk is far more problematic than an equal amount of water would be on your mattress. Understanding why helps you appreciate the urgency of proper cleaning and the specific techniques required for success.
Dairy milk contains approximately three to four percent fat, along with proteins like casein and whey, plus natural sugars called lactose. When milk makes contact with your mattress, these components begin separating and sinking into the fibers almost immediately. The proteins and fats bond with fabric and foam in ways that plain water cannot match, creating both visible staining and invisible residue deep within the material.
Within just a few hours, bacteria begin consuming the milk components that remain in your mattress. These bacteria thrive in the warm, enclosed environment between your sheets, and as they digest milk proteins, they produce gases responsible for that characteristic sour milk odor. The warmer your room and the deeper the milk has penetrated, the faster this bacterial colonization occurs.
The moisture from the spill creates additional complications beyond odor. Trapped liquid creates ideal conditions for mold and mildew growth, which can begin within 24 to 48 hours of the initial spill. Mold introduces serious health concerns and often means the mattress must be replaced entirely. Furthermore, moisture that reaches metal components like internal springs can cause rust stains that bleed through fabric layers.
Fresh milk responds dramatically better to cleaning than milk that has been sitting for hours or days. The difference between a five-minute cleanup and a day-long odor battle often comes down to how quickly you begin treating the spill and which techniques you use.
Act Fast: Critical First Steps
The initial moments after a milk spill determine your entire cleaning trajectory. Every second counts as the milk penetrates deeper and bacteria begin multiplying.
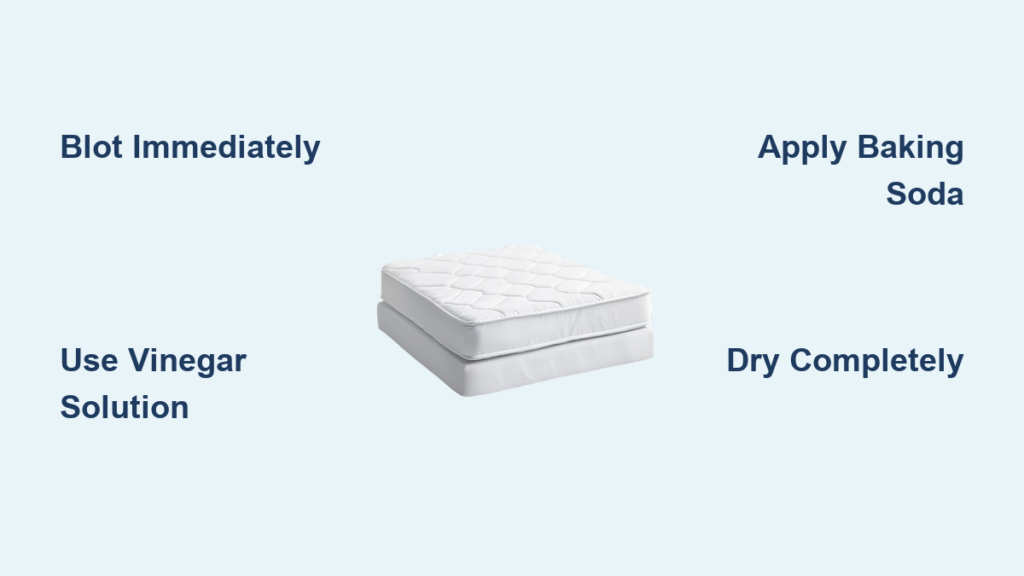
Grab clean white towels or paper towels immediately and begin pressing firmly against the spill. Lift straight up rather than rubbing, which forces the milk deeper into the foam and spreads it to clean areas. Work from the outside edges of the spill toward the center, creating a boundary that prevents the liquid from spreading outward. This technique, called “blotting,” absorbs far more liquid than scrubbing ever could.
Replace towels frequently as they become saturated. Continuing to press with a towel that has absorbed all it can only pushes milk back into the mattress. For large spills, you might need a dozen towels to remove all the excess liquid. If you have a wet/dry vacuum or shop vac, this equipment pulls moisture from deep within foam layers far more effectively than towels alone.
After addressing the visible spill, strip all affected bedding immediately and run it through the washing machine with hot water and regular detergent. Do not mix milk-soaked bedding with other laundry, as milk proteins can transfer to other garments. Check care labels for appropriate water temperatures, and add an extra rinse cycle to ensure complete removal. Air-dry the bedding completely before remaking the bed.
The goal during these first crucial minutes is removing as much liquid as possible before it penetrates deep into the mattress layers. The less milk that soaks in, the easier the remaining cleaning will be and the less likely you are to face lingering odors.
Gather Your Cleaning Supplies
Having the right materials ready before you begin ensures efficient and effective milk removal without interruptions that could allow the spill to worsen.
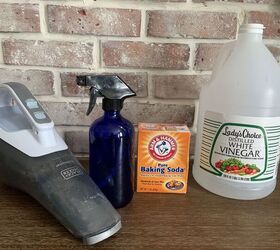
White vinegar serves as your primary cleaning agent for milk proteins. Its natural acidity breaks down the compounds in milk that cause both staining and odor. Mix equal parts white vinegar and warm water in a spray bottle for an effective solution that is safe for most mattress materials. The vinegar smell seems strong initially but evaporates completely as the mattress dries, taking the sour milk odor with it.
Baking soda works as a powerful deodorizer and moisture absorber essential for removing lingering smells. It draws out remaining moisture trapped in mattress fibers while neutralizing odor molecules. For stubborn odors, apply a generous layer that completely covers the affected area and leave it for at least eight hours.
You will need multiple clean white cloths or towels for blotting and cleaning. White cloths allow you to monitor your progress by showing how much milk you’re removing, and they eliminate any risk of dye transfer that colored towels might cause. Keep several on hand so you can switch to dry ones as needed.
A spray bottle enables controlled application of your vinegar solution, preventing oversaturation that could soak deeper foam layers. This control is essential because excessive moisture creates new problems by saturating areas that were previously unaffected.
Mild dish soap mixed with cool water creates an effective solution for lifting fresh milk residue. Add one squirt of soap to two cups of cool water. This method works best for spills that haven’t had time to set or develop strong odors.
For older spills or those developing sour smells, enzyme cleaners become necessary. These products contain specialized proteins that break down the organic compounds in milk that regular soap cannot touch. They work by actually destroying odor-causing compounds rather than just masking them temporarily. Look for enzyme cleaners in the pet care aisle, where they are designed to tackle organic protein stains.
Deep Clean the Stained Area
With the excess milk blotted up and your supplies ready, it’s time to thoroughly clean the affected area using techniques appropriate for how long the milk has been sitting.
For fresh spills that you caught immediately, mix a solution of mild dish soap and cool water. Dip a clean sponge into the mixture, wring it out so it is damp but not dripping, then gently wipe the stained area using circular motions. Avoid soaking the mattress; a damp sponge is all you need. Use a separate clean sponge dampened with plain cool water to remove soap residue, alternating between soap and water until your sponge stays clean after wiping.
For spills that have been sitting for an hour or more, or any spill developing a sour smell, apply your vinegar solution. Spray the affected area lightly, being careful not to oversaturate. Allow the solution to sit for five to ten minutes to break down milk proteins. Then blot firmly with clean white towels to remove both the vinegar solution and dissolved milk residue. Repeat this process until the towels come away with no milk odor or residue.
For older spills or dried milk stains, enzyme cleaners become essential. Apply the enzyme cleaner directly onto the affected area according to product instructions, ensuring complete coverage. Let the enzymes sit for fifteen to thirty minutes so they can penetrate and break apart the fat and protein molecules. Blot the area dry with clean white towels afterward. You may need to repeat this process for stubborn stains.
Whatever cleaning method you use, never apply hot water to milk stains. Heat causes milk proteins to bond permanently with fabric fibers, similar to how heat cooks an egg and makes it stick to a pan. Stick to cool or room temperature water throughout the entire process.
Remove Lingering Milk Odors

Even after thorough cleaning, milk odors sometimes persist because bacteria have colonized areas your cleaning didn’t fully reach. Tackling these odors requires drawing out what remains and neutralizing the source.
Baking soda remains your most effective weapon against persistent milk odors. Sprinkle a generous layer over the entire affected area, extending slightly beyond the visible cleaned region. The baking soda should form a thick white coating at least a quarter inch deep. Let it sit undisturbed for at least eight hours, though twenty-four hours delivers better results for stubborn odors.
As the baking soda sits, it absorbs moisture and odor molecules trapped deep within mattress fibers. You will notice the powder clumping together as it absorbs liquid, which shows it is working effectively. For deep spills that have created strong odors, you may need to repeat this process two or three times over several days.
After the waiting period, use a vacuum cleaner with an upholstery attachment to thoroughly remove all residue. Make several slow passes over the area in overlapping patterns to ensure complete removal. Check that no white residue remains on the mattress surface.
If odors persist after the baking soda treatment, apply the vinegar solution again and let it air dry completely before applying fresh baking soda. These two treatments work in different ways, and using them sequentially can tackle odors that either alone cannot shift. Just remember never to mix them directly, as the resulting chemical reaction cancels out both products.
For severe odor problems that resist multiple cleaning attempts, the milk may have reached internal layers that DIY methods cannot adequately clean. In these cases, consider consulting a professional mattress cleaning service with specialized equipment designed for deep extraction and deodorizing.
Dry Your Mattress Completely
Proper drying is not optional when you’ve had a milk spill. Trapped moisture creates the perfect environment for mold and mildew, which can begin growing within 24 to 48 hours. Any moisture remaining when you remake the bed essentially reverses your cleaning efforts.
Position fans around the mattress to create continuous air circulation across the surface. A box fan on low speed aimed at the cleaned area works well, though multiple fans throughout the room speed the process considerably. Open windows if weather permits to bring in dry air and improve ventilation throughout the room.
Check the mattress frequently for remaining dampness by pressing your hand firmly against the surface and holding for ten seconds. If you feel any coolness or dampness, the mattress needs more drying time. The surface might feel dry while moisture remains deeper in the foam layers.
Allow at least 24 hours of drying time before making the bed, though six to eight hours of active airflow with fans is typically sufficient for the surface to feel dry to the touch. If you can safely move your mattress outdoors, direct sunlight offers UV disinfection that kills odor-causing bacteria while the sun’s heat accelerates evaporation. Even two to three hours in bright sunlight makes a noticeable difference.
If you need to use the room before the mattress is completely dry, consider using a dehumidifier to pull moisture from the air. This helps the mattress dry faster and prevents the humid room environment from re-introducing moisture into the foam layers.
Clean Different Mattress Types
Various mattress constructions require slightly different approaches to prevent damage while ensuring effective cleaning.
Memory foam mattresses demand delicate handling due to their highly absorbent nature. Use minimal moisture when cleaning, as memory foam traps liquid deeper than other materials and takes much longer to dry. The dense structure requires significantly increased drying time, and the temperature-sensitive material means avoiding hot water entirely. Consider using specialized memory foam cleaners designed for this material, and always test any solution on a hidden area first.
Pillow top mattresses present unique challenges because their layered construction can trap milk in multiple places. Clean the surface layer first, then check if the liquid has penetrated the padded layers beneath. Use gentle pressure when blotting to avoid compressing and spreading the spill, as the quilted surface can create pockets where milk pools. The thicker construction means these mattresses typically take longer to dry, so position fans specifically to address the padded areas.
Traditional spring mattresses often allow liquid to penetrate quickly between the layers. Focus on thorough initial blotting to prevent milk from reaching internal springs, which can rust and stain if exposed to moisture. Check the mattress sides for any dripping or seepage, and clean surrounding areas if the liquid has traveled horizontally through padding layers. Consider propping the mattress on its side after cleaning to prevent liquid from pooling around springs.
Natural latex mattresses require gentle cleaning methods to preserve their organic properties. Use less cleaning solution to prevent potential material breakdown, and avoid harsh chemicals that might react with the natural latex. Consider using plant-based or natural cleaning solutions to maintain the mattress’s eco-friendly properties. The dense structure of latex may require longer drying times, though its natural antimicrobial properties help prevent mold growth.
Handle Dried Milk Stains
Dried milk stains require additional steps because the proteins have already begun bonding with mattress fibers. The cleaning process takes longer but follows similar principles.
Begin by lightly dampening the dried milk stain with cold water to rehydrate and soften the residue. This rehydration makes the subsequent cleaning more effective. Apply the water sparingly using a spray bottle or damp cloth; you want the stain damp but not soaked.
Apply enzyme cleaner directly to the rehydrated stain, as these cleaners contain specialized proteins that break down milk compounds. Let the enzyme cleaner sit for fifteen to thirty minutes to penetrate and break apart the dried residue. Blot the area with clean white towels to remove the dissolved residue.
You may need to repeat the cleaning and rinsing process several times for complete removal. For each repetition, apply fresh enzyme cleaner, wait, then blot dry. Between applications, allow the area to air dry slightly so the next application can penetrate effectively rather than diluting in excess moisture.
For persistent stains that remain after multiple attempts, consider a deeper cleaning with a carpet cleaner using the upholstery attachment. If even professional-grade cleaning cannot restore the area, the stain may be permanent, though the odor can still be eliminated.
Never use hot water on dried milk stains, as heat sets proteins more firmly into the fabric. Stick to cool water throughout, and be patient with the process.
Prevent Future Milk Spills
Investing in prevention saves you from the stress and effort of cleaning milk from your mattress in the future.
Quality mattress protectors create an effective barrier against spills while maintaining comfort. Choose breathable materials that prevent liquid penetration without trapping heat, and ensure the protector fully encases the mattress with secure seams and zippers. Look for options certified for liquid protection while maintaining airflow, and wash the protector regularly to maintain its protective qualities. A quality waterproof mattress protector blocks liquids from reaching the foam completely, letting you simply remove and wash the cover instead of deep cleaning the mattress.
Store a small emergency cleaning kit in your bedroom closet so you can begin treating spills within seconds. Your kit should include several clean absorbent towels, a spray bottle filled with vinegar solution, baking soda in a container, and mild dish soap. Having supplies within arm’s reach means you can begin blotting immediately rather than searching for materials during those critical first minutes.
Establish household rules about food and drinks in bed to minimize risk. Designate specific activities to certain areas of the home, and keep beds as food-free zones whenever possible. For special occasions like breakfast in bed, take precautions by using trays and keeping cleaning supplies nearby.
Regular inspection of your mattress protector helps identify wear before it allows spills to reach your mattress. Check monthly for signs of damage, thinning of the waterproof barrier, or compromised seams. Replace the protector every one to two years, or sooner if you notice any decrease in its protective qualities.


