
Cutting a sponge mattress might seem intimidating at first, but with the right tools, techniques, and preparation, this DIY project becomes surprisingly manageable. Whether you’re customizing a mattress for a unique bed frame, creating comfortable pet beds, or need a specific size for a DIY project, knowing how to cut a sponge mattress properly ensures clean edges and professional results. Many people discover that standard mattress sizes don’t fit their needs, whether it’s an RV, boat, antique bed frame, or specialized seating arrangement. Rather than spending hundreds on a custom-order mattress, you can achieve excellent results with some patience and the right approach.
This guide walks you through every step of the cutting process, from selecting the appropriate tools to finishing edges that look factory-made. We’ll cover the various types of sponge materials you might encounter, essential safety precautions, measurement techniques that prevent costly mistakes, and finishing methods that extend the life of your newly cut mattress. By the end of this article, you’ll have all the knowledge needed to tackle your sponge mattress project with confidence.
Tools and Materials Needed
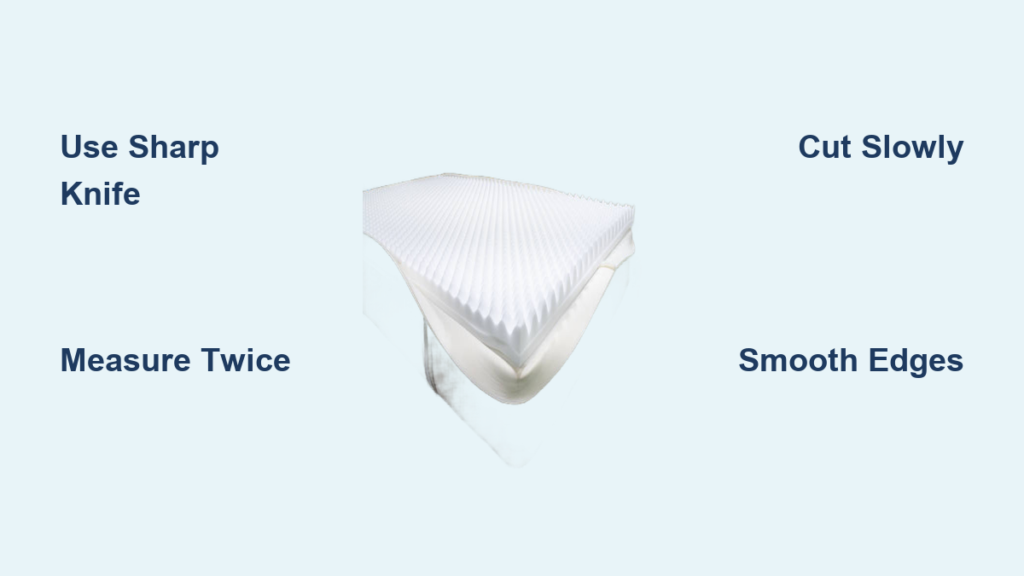
Before you begin learning how to cut a sponge mattress, gathering the right tools makes the difference between a frustrating struggle and a smooth, satisfying project. The primary tool you’ll need is a sharp knife or cutting implement—electric knives work exceptionally well for sponge materials, producing clean cuts with minimal effort. A quality utility knife with fresh blades serves as an excellent alternative, though it requires more physical effort and a steadier hand.
Beyond your cutting tool, you’ll need measuring and marking supplies. A retractable tape measure provides accurate dimensions, while fabric chalk or a washable marker allows you to trace cutting lines clearly on the sponge surface. Some professionals prefer using a carpenter’s pencil for its visibility and easy cleanup. You’ll also want a straight edge or ruler to ensure your lines remain straight across longer cuts—a metal yard stick or level works perfectly for this purpose.
Protective equipment deserves equal consideration. Safety glasses prevent small foam particles from entering your eyes during cutting, and a dust mask keeps airborne particles from your lungs, especially important when working with older mattresses that may have degraded foam. Work gloves protect your hands from slips and provide better grip on both tools and materials. Finally, having a clean, stable workspace with adequate lighting significantly improves your accuracy and safety throughout the project.
Choose the Right Sponge Type
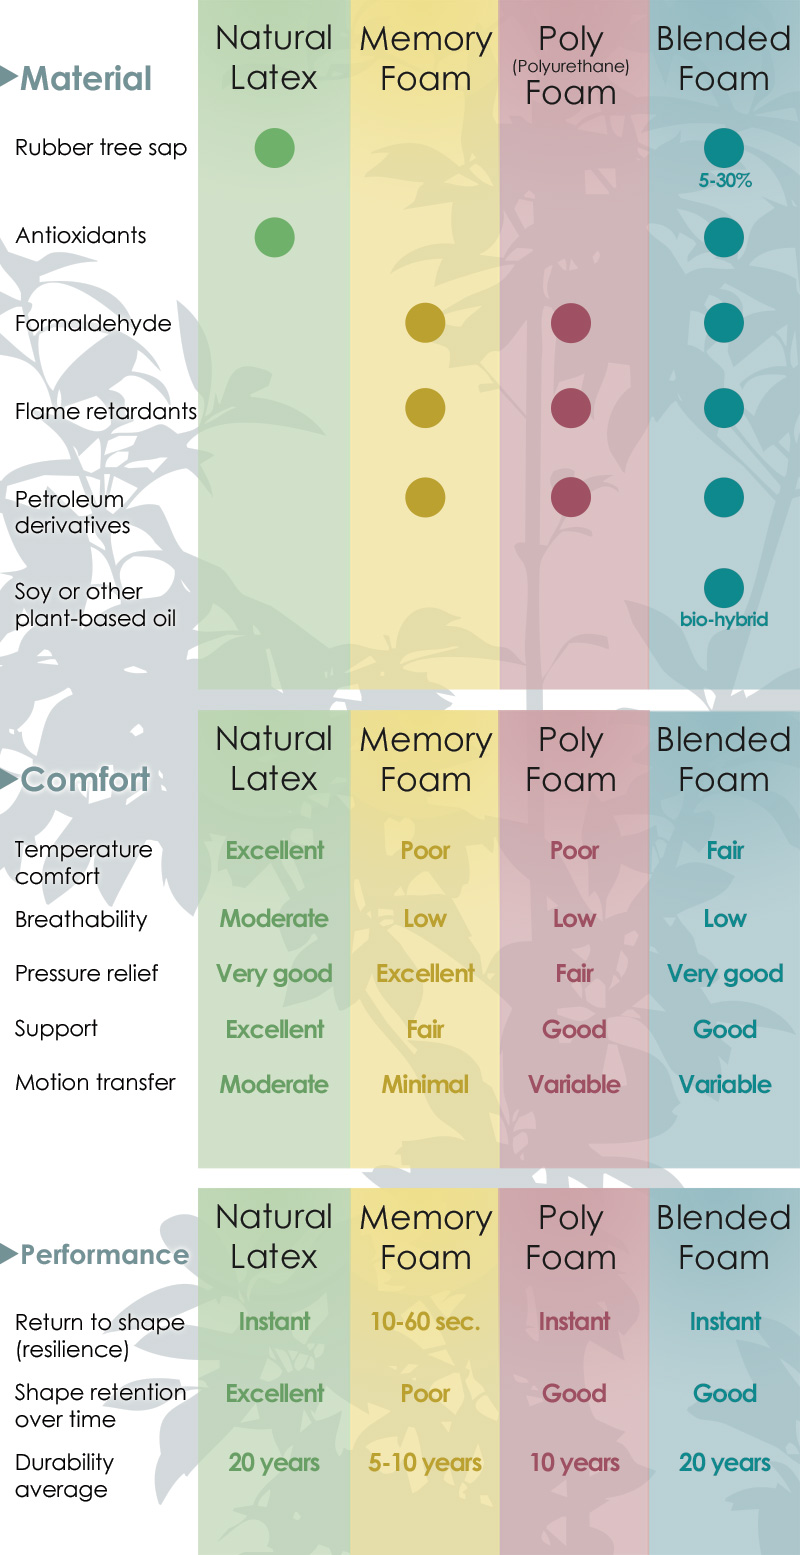
Understanding the composition of your sponge mattress before you cut saves time, money, and frustration. Sponge mattresses come in several distinct varieties, each responding differently to cutting techniques. Memory foam mattresses feature dense, temperature-sensitive material that compresses under pressure and requires sharp blades to achieve clean cuts without tearing or crushing the cells. Traditional polyurethane foam is generally easier to cut but can produce more airborne particles during the process.
Latex sponge mattresses present unique challenges because the material is more resilient and bounces back quickly after compression. Cutting latex requires sharper blades and potentially scoring the surface multiple times before completing the cut. Some modern mattresses combine multiple foam layers with different densities, creating a sandwich effect that may delaminate if not cut carefully. Identifying these layers helps you adjust your technique accordingly.
High-density foams, often found in premium mattresses, resist cutting more aggressively than standard foams and benefit from serrated blade edges or electric cutting tools. Low-density foams cut easily but may compress or distort under pressure, requiring support beneath the cutting area to maintain shape. When possible, consult any manufacturer documentation that came with your mattress to understand its exact composition, or examine the cut ends of the mattress to identify the foam type before committing to your cutting strategy.
Measure and Mark Accurately
Precision in measurement prevents costly mistakes when you cut a sponge mattress. Begin by measuring the exact dimensions needed for your project, taking multiple measurements across the length and width since many mattresses aren’t perfectly rectangular. Record these measurements and add them to your cutting plan, accounting for any seam allowances or fit tolerances required by your application.
Marking your foam requires careful attention to ensure your cutting line remains visible throughout the process. Place the mattress on a clean, flat surface where it can remain undisturbed during marking and cutting. Use your tape measure to mark key points along the perimeter, then connect these points with your straight edge to create continuous cutting lines. For complex shapes or curves, use a flexible curve or trace around a template made from cardboard or paper.
Double-check all measurements and markings before making any cuts. A good practice involves measuring twice and cutting once—a principle that becomes especially valuable when working with expensive foam materials. Mark both the front and back surfaces with small guide points at corners and along edges, creating reference points you can follow as your cut progresses. This redundancy ensures accuracy even if your cutting line becomes obscured by foam particles or knife marks during the process.
Cutting Techniques
The actual cutting process requires steady, confident movements rather than hesitating or sawing back and forth. For manual cutting with a utility knife, position your blade at a slight angle to the foam surface and draw it toward your body in long, smooth strokes. Allow the sharp blade to do the work—pressing harder only increases the risk of slipping and creates ragged edges. Make multiple light passes rather than attempting to cut through in a single stroke, especially with denser foam materials.
Electric knives excel at cutting sponge mattresses by providing consistent power and reducing physical effort. Guide the blade along your marked line slowly, allowing the vibrating edge to penetrate the foam ahead of your movement. Keep the knife perpendicular to the foam surface for straight cuts, tilting only when beveled edges are specifically desired. The serrated edge of electric knife blades creates slightly rougher surfaces than sharp utility knives but produces straighter lines with less effort.
When cutting complex shapes or curves, make initial relief cuts at corners before attempting to navigate tight turns. These small cuts remove foam that would otherwise bunch and distort as you maneuver around curves. For very tight curves, consider using scissors specifically designed for foam cutting—they provide greater control in constrained spaces and allow you to pivot more naturally than rigid knife blades. Regardless of your chosen method, maintain a firm grip on your tool and keep your non-cutting hand well away from the blade path at all times.
Smooth and Finish Edges

Freshly cut foam edges often appear rough or uneven immediately after cutting, but several techniques restore a professional appearance. For minor imperfections, light sanding with fine-grit sandpaper or a foam sander smooths surface irregularities without removing significant material. Work in gentle circular motions, checking progress frequently to avoid over-sanding into凹 areas. This process also removes any minor delamination that occurred along the cut edge.
More significant edge irregularities may require trimming with sharp scissors or a fresh blade. Examine the edge from multiple angles to identify high spots that protrude beyond the intended line, then carefully remove excess material. Some craftsmen prefer using a hot knife or heated wire for finishing passes—the heat melts foam cells slightly, creating sealed edges that resist fraying and present a cleaner appearance. This technique requires practice and caution but produces excellent results on visible edges.
Consider edge finishing methods appropriate to your project’s final use. Exposed edges benefit from fabric covering, edge binding, or spray adhesives applied to prevent abrasion and deterioration. For mattress applications where the edge contacts bedding, a simple clean cut with smoothed surfaces works sufficiently. If your cut edge will be visible in the final project, applying a thin layer of foam-safe contact cement and pressing fabric over the edge creates a finished appearance while protecting the foam from wear and contamination.
Safety Precautions

Safety should remain your priority throughout any foam cutting project. Sharp blades require respect and careful handling—always cut away from your body, keep fingers behind the cutting line, and set tools down with blades pointing safely away from walkways. When making long cuts, maintain control by gripping the tool firmly with both hands if possible, and never attempt to cut faster than your reaction time allows you to stop or redirect.
Foam materials, especially those manufactured before current environmental regulations, may contain chemicals or produce dust irritating to respiratory systems. Always work in well-ventilated areas and wear appropriate dust masks rated for fine particles. Safety glasses protect against both flying debris during cutting and accidental blade contact. If you’re working with memory foam or other materials that off-gas noticeably, consider wearing a respirator with organic vapor cartridges for additional protection.
Electrical safety applies when using powered cutting tools. Keep cords away from cutting paths and wet surfaces, inspect tools for cord damage before use, and avoid operating equipment in damp conditions. Electric knives and heated cutting tools generate enough heat to cause burns—allow them to cool completely before storage and handle heated components with appropriate protection. Having a first aid kit nearby, particularly for minor cuts, demonstrates prudent preparation for any workshop activity.
Cutting a sponge mattress opens possibilities for customization that store-bought sizes simply cannot match. By following these techniques—selecting appropriate tools, understanding foam types, measuring precisely, cutting carefully, and finishing properly—you achieve professional-quality results without professional prices. Whether your project involves a single custom cut or multiple pieces for complex builds, the skills developed through this process transfer to future foam projects and provide lasting value for any DIY enthusiast or craftsperson working with flexible foam materials.


