
Vacuum sealing a mattress transforms a bulky, unwieldy item into a compact package that’s easy to move, store, or transport. If you’ve ever struggled to fit a mattress into a small vehicle or storage unit, you know the frustration of dealing with its cumbersome size. Learning how to vacuum seal a mattress properly can reduce its volume by up to 80%, making it manageable for even tight spaces. Whether you’re moving apartments, storing seasonal bedding, or protecting your investment during home renovations, this technique preserves your mattress while solving space challenges.
The benefits extend beyond simple size reduction. A properly vacuum-sealed mattress stays protected from dust mites, bed bugs, and moisture that can damage bedding during storage. Foam mattresses, in particular, benefit from being sealed away from humidity that causes mold and mildew. For students, frequent movers, or anyone with limited storage space, mastering how to vacuum seal a mattress means keeping your sleeping surface clean, dry, and ready for use whenever you need it.
Before diving into the process, understand that not all mattresses respond well to vacuum sealing. Using the wrong technique or attempting to compress an incompatible mattress type can cause permanent damage. This guide covers everything you need to know to successfully vacuum seal your mattress without compromising its integrity or comfort.
Select Compatible Mattress Types for Compression
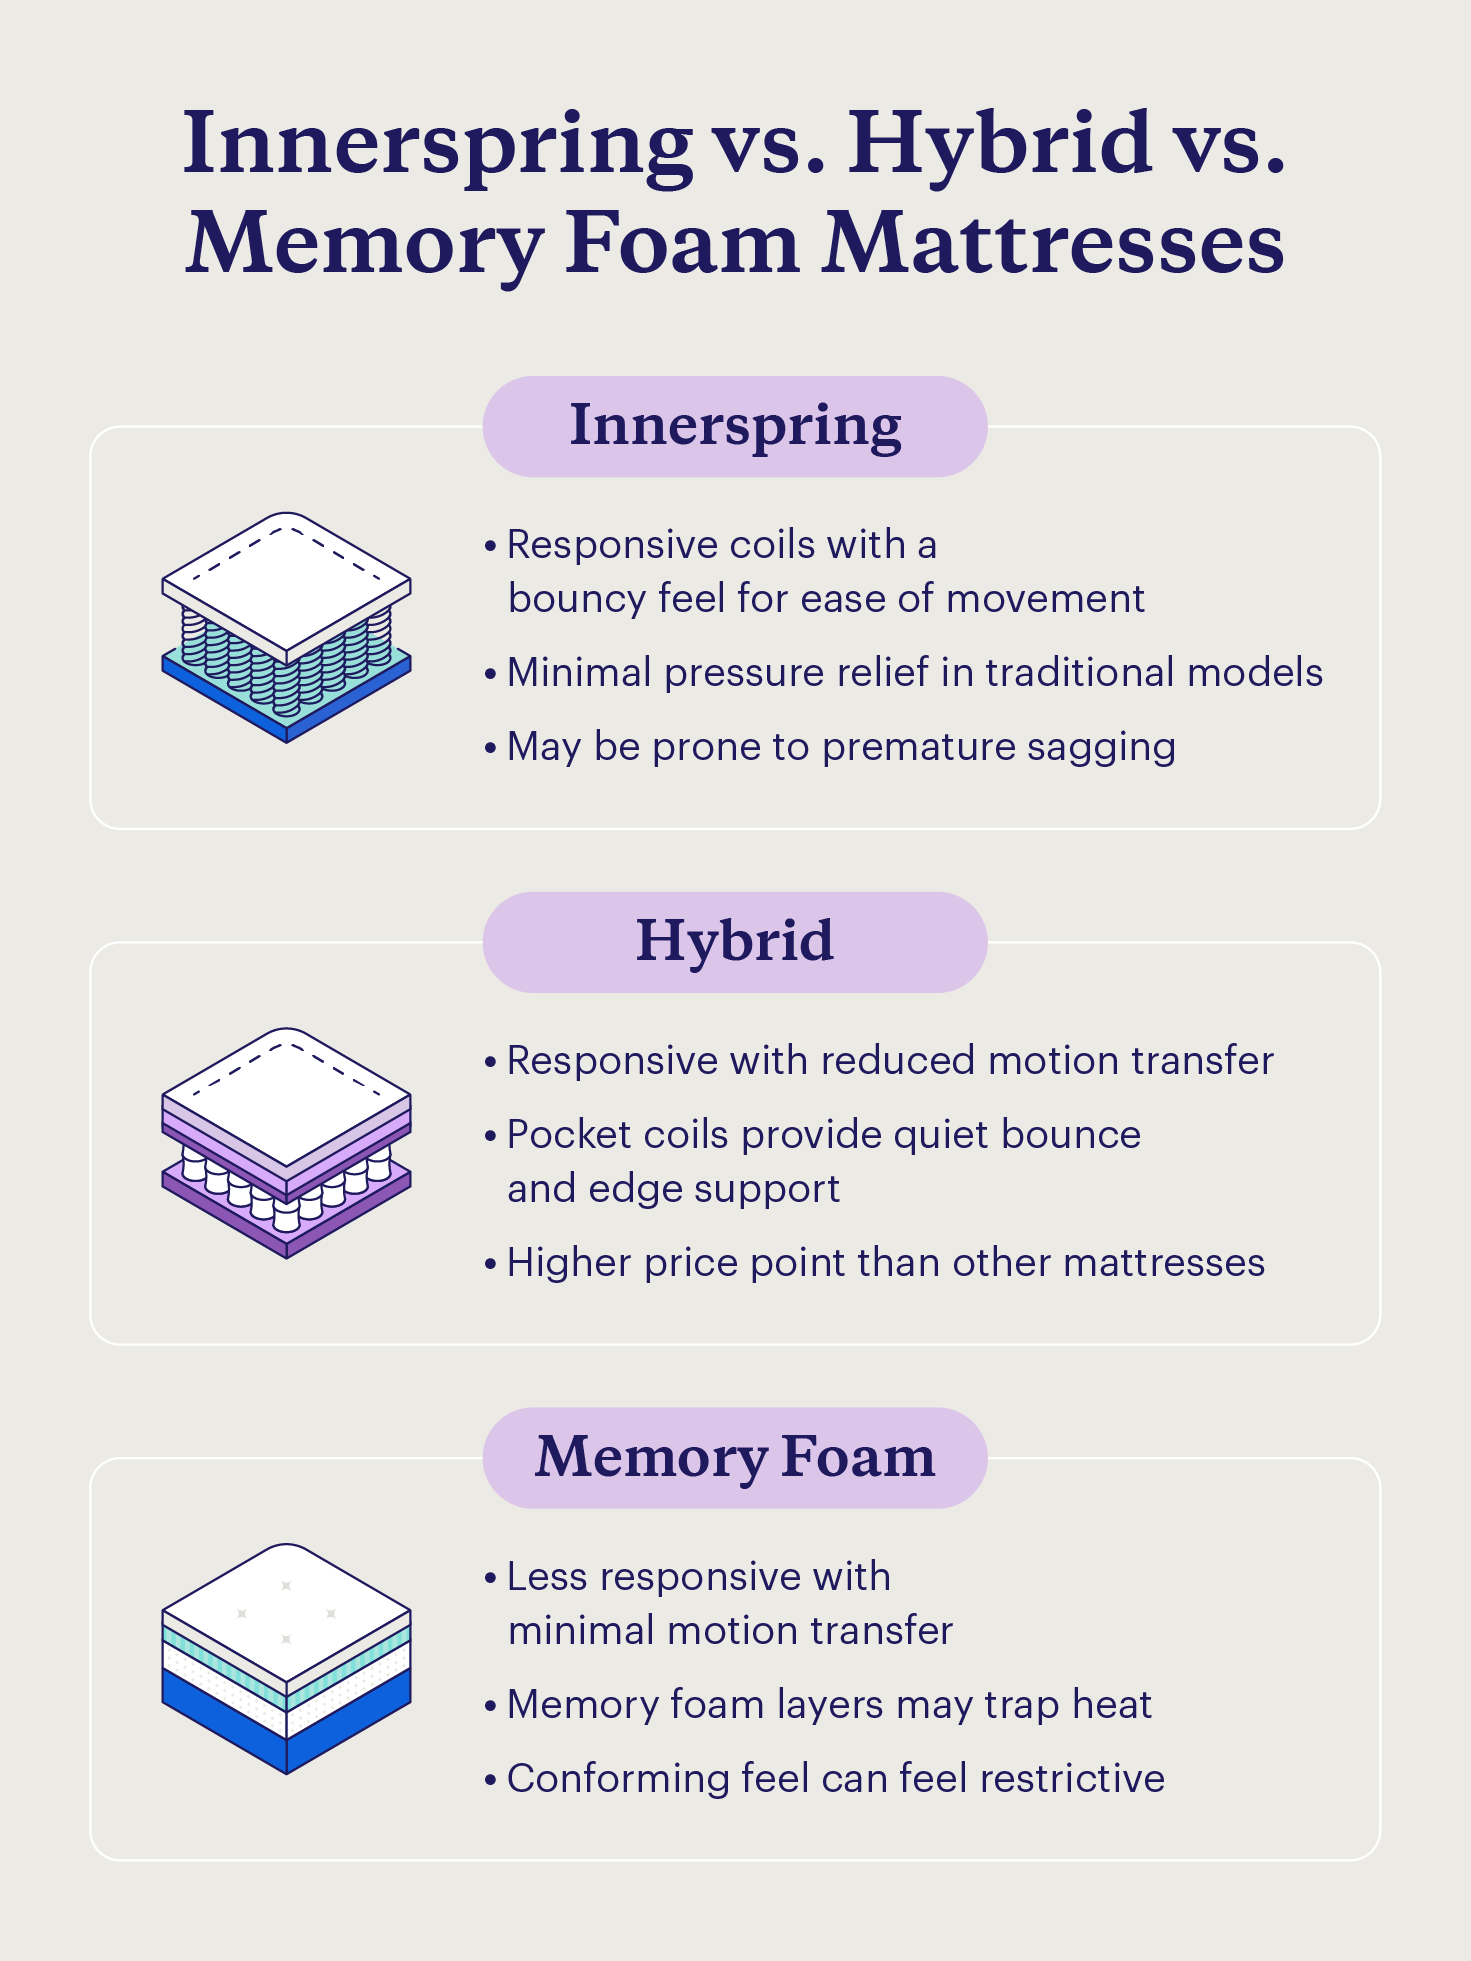
Your first critical decision when learning how to vacuum seal a mattress involves identifying which mattress types can withstand compression. Memory foam mattresses represent the ideal candidate for this process. Their cellular structure allows significant compression while maintaining resilience, typically recovering fully within 24-72 hours after unsealing. High-density memory foams compress best, while lower-density varieties may show temporary impressions.
Latex mattresses also handle vacuum sealing effectively, with natural latex generally outperforming synthetic versions in recovery. These mattresses maintain their supportive properties after compression and usually return to full loft with minimal intervention. Check your latex mattress specifications to confirm it’s suitable for this storage method.
Hybrid mattresses present a more complex scenario. Those with substantial foam comfort layers over pocketed coils may compress adequately if the foam layer is at least 3 inches thick. However, the coil system requires careful handling—excessive compression can bend springs and compromise support. Always test a small section first or consult manufacturer guidelines before attempting to vacuum seal a hybrid mattress.
Why Innerspring Mattresses Can’t Be Vacuum Sealed
Attempting to vacuum seal an innerspring mattress will cause irreversible damage to its structural integrity. The metal coil system cannot compress without permanent deformation, leading to:
- Warped springs that create uncomfortable pressure points
- Broken coils that poke through fabric layers
- Compromised edge support that affects overall stability
- Voided manufacturer warranties due to improper handling
Similarly, pillow-top and euro-top mattresses with thick comfort layers attached to the sleep surface typically cannot withstand compression. The stitching holding these layers in place often pulls or tears under vacuum pressure, creating permanent indentations that ruin comfort.
Gather Professional-Grade Equipment for Success

Using the right tools makes the difference between a successful vacuum seal and a torn bag that compromises your mattress protection. Standard vacuum storage bags designed for clothing lack the strength needed for mattress compression.
Essential Vacuum Sealing Supplies Checklist
- Mattress-specific vacuum bags: Choose heavy-duty bags sized specifically for your mattress dimensions (twin, full, queen, king)
- Industrial-strength vacuum cleaner: Shop vacs or canister models with strong, sustained suction outperform standard uprights
- Reinforced valve system: Look for double-seal valves that prevent air leakage during long-term storage
- Protective outer casing: A cardboard mattress box or heavy-duty storage bag provides puncture protection
- Desiccant packets: These moisture absorbers prevent mold growth inside the sealed environment
Avoid cheap, thin bags that tear easily under compression pressure. Invest in multi-layer construction with reinforced seams—these bags cost more but prevent costly failures. For larger mattresses, consider renting an industrial vacuum sealer from moving supply stores, which achieves tighter compression than household equipment.
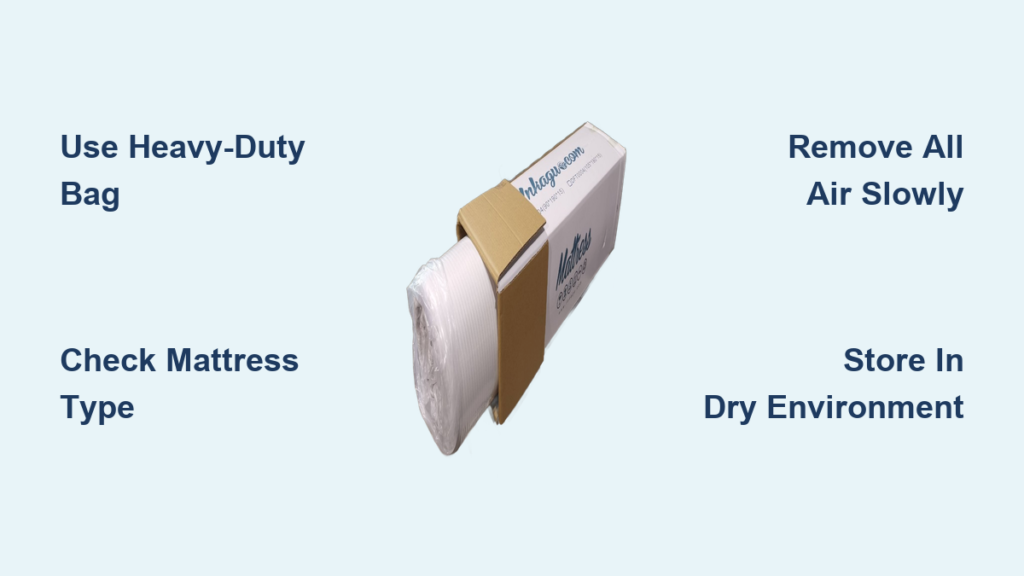
Execute Proper Mattress Preparation Steps
Thorough preparation prevents common issues that derail the vacuum sealing process. Start by cleaning your mattress completely—vacuum both sides to remove dust, dead skin cells, and allergens that would become trapped inside the sealed bag. Address any stains with a mild cleaning solution, allowing 24-48 hours for complete drying before attempting to seal.
Choose a spacious, clean workspace with smooth flooring—hardwood, tile, or concrete surfaces work best. Lay down a clean sheet or moving blanket to protect both your floor and the mattress during the process. Measure your mattress dimensions carefully to ensure your vacuum bag provides adequate coverage, with at least 4-6 inches of extra material on all sides for proper sealing.
Critical Pre-Sealing Checklist
- Verify mattress is completely dry (no moisture)
- Confirm no bed bugs or pests are present
- Remove all bedding and mattress protectors
- Document current condition with photos
- Check manufacturer guidelines for compression restrictions
Master the Compression Technique
The actual sealing process requires patience and proper technique to achieve maximum air removal without damaging your mattress. Insert the mattress into the bag carefully, avoiding sharp folds or creases that create weak points. With a helper, lower the mattress flat into the bag; working alone, roll it partially for easier insertion.
Attach your vacuum hose securely to the bag’s valve and begin removing air slowly. As the mattress compresses, gently press from the far end toward the valve to push trapped air toward the extraction point. Continue vacuuming until the mattress feels firm and no significant airflow remains—this typically takes 15-20 minutes for queen or king sizes.
Seal Maintenance Tips
- Close the valve only when maximum compression is achieved
- Double-check zipper integrity before final sealing
- Test the seal by pressing gently on the compressed mattress
- Add a secondary protective layer immediately after sealing
Store and Transport with Care
:strip_icc()/BHG-vacuum-seal-bags-storage-7369797-step-02-44467-673419b6e4cd43dbbeaca6236ee0a47f.jpg)
A compressed mattress requires special handling despite its reduced size. Use a dolly or hand truck for transport rather than lifting directly, and always slide the mattress onto surfaces rather than dragging it. Protect the sealed unit with an additional layer—slip it into a large plastic storage bin or wrap it in furniture padding to prevent punctures.
Store your vacuum-sealed mattress in a climate-controlled environment whenever possible. Avoid garages, sheds, or storage units without temperature regulation, as extreme heat can degrade foam materials while cold temperatures make plastic bags brittle. Elevate the mattress off the floor on pallets or shelves to protect against potential water damage.
Check your sealed mattress every 2-3 months during long-term storage. Look for signs of air leakage, bag damage, or environmental threats that might compromise your mattress. If you notice any issues, reseal the mattress before problems escalate.
Properly Unseal and Reinflate Your Mattress
When you’re ready to use your mattress again, follow these steps for optimal recovery. Move the compressed unit to its final location before opening the seal—once air enters the bag, the mattress rapidly regains size and becomes difficult to maneuver.
Open the valve completely and allow air to enter gradually. Monitor the expansion process to ensure even inflation across the entire surface. Most memory foam mattresses reach 80% of their original loft within 4-6 hours but require 24-72 hours for complete recovery.
Avoid sleeping on the mattress during the initial recovery period. Place heavy objects on specific areas to encourage even expansion if certain sections seem slow to rebound. After full recovery, inspect the mattress for any damage that might have occurred during storage.
Avoid Costly Vacuum Sealing Mistakes
Many DIY attempts fail due to preventable errors. Never vacuum seal an innerspring mattress—this causes permanent damage to the coil system. Using undersized or flimsy bags leads to tears during compression, while inadequate cleaning before sealing traps moisture that causes mold.
Rushing the vacuuming process results in incomplete compression that wastes storage space. Store compressed mattresses in temperature-stable environments only—extreme heat or cold compromises both the bag integrity and mattress materials. Never leave a mattress compressed for more than 6-12 months, as prolonged pressure can affect foam resilience.
When to Call Professional Services
Consider professional assistance if you’re working with oversized mattresses (king or California king), valuable antique bedding, or high-end specialty mattresses. Professional movers have industrial equipment that achieves tighter, safer compression than consumer-grade tools. They also provide proper documentation and handling procedures that protect your warranty coverage.
For frequent movers or those with multiple mattresses to store, professional services often prove more cost-effective than purchasing specialized equipment. If you’ve attempted DIY vacuum sealing unsuccessfully multiple times, professional consultation can identify technique issues that prevent successful compression.
Mastering how to vacuum seal a mattress properly transforms a daunting storage challenge into a simple, space-saving solution. By selecting compatible mattress types, using professional-grade equipment, and following careful technique, you protect your investment while maximizing available space. Whether you’re moving across town or storing seasonal bedding, this skill ensures your mattress remains clean, dry, and ready for comfortable use whenever you need it. Take your time with each step, prioritize quality materials, and your vacuum-sealed mattress will emerge from storage in excellent condition.


