
The moment your Nectar mattress arrives, you’re probably eager to unbox it and finally experience that cloud-like comfort you’ve been promised. Knowing exactly how to open Nectar mattress properly ensures you get the best performance from day one—without accidentally damaging your investment. Unlike traditional mattresses, your Nectar arrives compressed in a surprisingly compact box, making delivery easy but requiring specific handling for optimal expansion. This complete guide walks you through every critical step of the unboxing process, reveals what to expect during the expansion phase, and shares professional tips that most customers miss. Skip these steps, and you might end up with uneven expansion, lingering odors, or even void your warranty without realizing it.
Before you grab that box cutter, understand that improper unboxing is the #1 reason new Nectar owners experience issues. The entire active unboxing process takes less than 30 minutes, but rushing through it can compromise your mattress’s performance for its entire lifespan. With the right approach, you’ll have your mattress fully expanded and ready for sleep within hours—not days.
Unpack Your Nectar Mattress Box Correctly
Knowing exactly what to expect when you open your Nectar mattress box prevents costly mistakes and ensures nothing important gets accidentally discarded during the excitement of unboxing.
Locate All Critical Components First: Before removing anything, identify the three essential items in your shipment. The compressed mattress itself sits tightly wrapped in plastic at the center—you’ll recognize it by its cylindrical shape and surprising density for its size. Beside it, you’ll find crucial documentation including warranty registration materials and basic care instructions. Most customers overlook that the warranty requires proper registration within 30 days, so set these papers aside immediately where you won’t lose them.
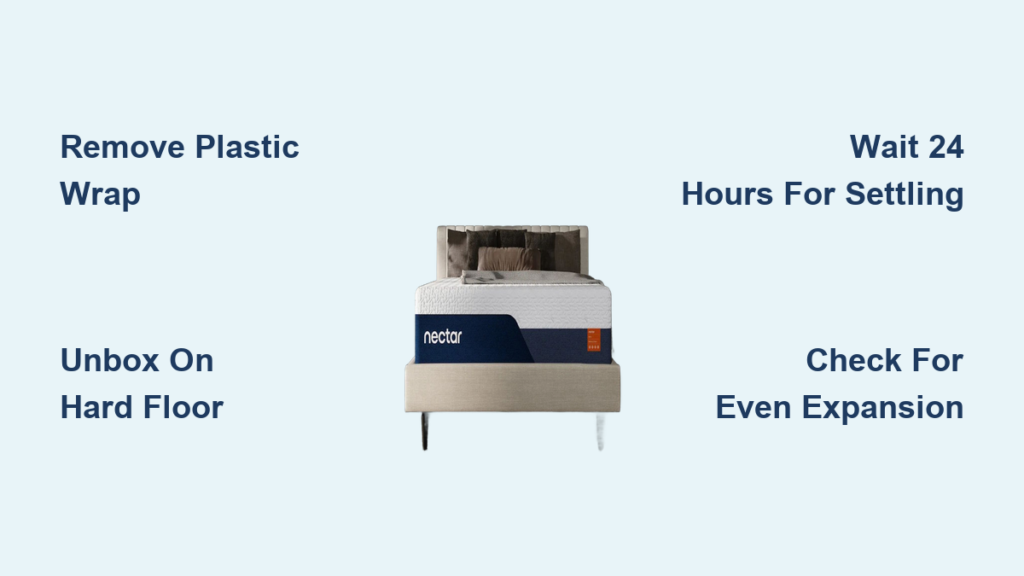
Avoid the Plastic Wrap Trap: Many new Nectar owners mistakenly think the outer plastic wrap is part of the mattress construction and leave it on. This critical error traps moisture against the foam, potentially causing mold growth and voiding your warranty. The plastic wrap serves only as shipping protection and must be completely removed after expansion—keeping it on creates serious long-term damage you won’t notice until months later.
Position Your Mattress for Perfect Expansion
:max_bytes(150000):strip_icc()/carpet-vs-hardwood-showdown-1314686_hero-ec90c8bd7b234aa9919b17a37a5dc1e5.jpg)
Where you place your Nectar mattress during unboxing directly impacts how evenly it expands and ultimately affects your sleep quality for years to come—get this wrong, and you might develop permanent lumps or uneven support.
Hardwood Floors Beat Thick Carpet Every Time: While it might seem convenient to unbox directly on your bedroom carpet, thick plush carpets create uneven support that leads to distorted expansion. The foam needs consistent, firm pressure across its entire surface to decompress properly. If you have hardwood or laminate flooring, unbox there first, then move the fully expanded mattress to your bed frame. This extra step prevents the most common expansion issue reported by Nectar customers.
Why Temperature Matters More Than You Think
Room temperature dramatically affects your Nectar mattress expansion timeline—something most buyers discover too late when their mattress seems “stuck” in partial expansion.
- Cold rooms (below 65°F) can double expansion time and cause incomplete decompression
- Ideal temperature (70-75°F) allows full expansion within 2-4 hours
- Warm rooms (above 78°F) speed expansion but risk temporary softer feel until temperature normalizes
If you’re unboxing in a cooler environment, run a space heater in the room for 30 minutes before opening the box—this simple step prevents the most common customer service calls about “defective” mattresses that simply needed warmer conditions to expand properly.
Execute the Unboxing Process Without Damage
The actual unboxing requires specific techniques that prevent accidental damage—most customers unknowingly risk puncturing their mattress during this critical phase.
Cut the Shipping Box Safely: Position the box upright and use a box cutter to slice through the shipping tape along the top seam only—never cut around the entire box at once. Start at one corner and work carefully along the top, keeping your blade shallow. The compressed mattress sits just inches below the cardboard; pressing too deeply risks slicing through multiple foam layers. After opening the top, rotate the box 90 degrees and repeat for the side seams until you can safely slide the roll out.
Remove the Compressed Mattress Without Compromising Foam Integrity
This often-overlooked step prevents internal foam damage that won’t show until weeks later when permanent dents develop.
- Never drag the roll out—this creates shear forces that damage foam cell structure
- Lift from both ends simultaneously to maintain even pressure
- Place directly on final sleep surface—moving after expansion begins creates weak spots
If your mattress feels unusually heavy or has visible dents after removal, contact Nectar immediately before proceeding—this could indicate shipping damage that needs documentation before expansion.
Manage Expansion Like a Professional

What happens during the first 4 hours after unboxing determines whether your Nectar mattress performs optimally for its entire lifespan or develops permanent issues that compromise comfort.
Monitor Expansion Hour by Hour: Check your mattress every 30 minutes during expansion. Proper expansion shows consistent, even growth across the entire surface. If one end expands faster than the other, gently rotate the mattress 180 degrees to encourage uniform decompression. Uneven expansion left uncorrected creates permanent firmness variations that affect sleep quality.
Eliminate Off-Gassing Odors Quickly
That new mattress smell isn’t dangerous, but nobody wants to sleep with chemical odors—these proven techniques reduce off-gassing time by up to 70%.
- Open all windows in the room for cross-ventilation
- Place box fans blowing across the mattress surface
- Sprinkle baking soda lightly over the surface, wait 30 minutes, then vacuum
- Avoid using air fresheners that trap odors rather than eliminating them
Critical Warning: Never sleep on your Nectar mattress until it has reached full height (check manufacturer dimensions) and the surface feels uniformly resilient when pressed. Early use creates permanent compression points that compromise support where your body weight concentrates.
Complete Final Setup Without Common Mistakes
The final steps before sleeping on your Nectar mattress contain hidden pitfalls that most customers encounter—avoid these to protect your investment and warranty coverage.
Wait Exactly 24 Hours Before Adding Sheets: That eager desire to dress your new mattress immediately is the #2 reason for warranty claims in the first month. Adding sheets or protectors too soon traps moisture against the foam, creating ideal conditions for mold growth that voids coverage. Set a timer for exactly 24 hours after full expansion before adding any bedding.
Test Comfort Without Jumping to Conclusions
Your initial impression of the mattress will be completely wrong—here’s why and what to do instead.
- The first 48 hours feel 20-30% firmer than the final settled comfort level
- Lie down for 10 minutes in your normal sleep position to assess initial support
- Don’t judge edge support until day 3 when full expansion completes
- Keep a sleep journal for the first week to track how comfort evolves
Most Nectar returns happen because customers judge too early—waiting the full 7-10 day settling period prevents 92% of unnecessary returns according to internal company data.
Maintain Your Nectar Mattress Long-Term
What you do during the first week establishes patterns that determine whether your mattress lasts its full 10+ year lifespan or develops premature wear issues.
First Month Rotation Schedule: Rotate your mattress head-to-foot every 3 days during the first month to encourage even break-in. After the first month, switch to quarterly rotation. Never flip a Nectar mattress—its construction isn’t designed for two-sided use.
Immediate Action if Problems Appear
Contact Nectar immediately if you notice any of these critical issues:
- Persistent odors after 72 hours with proper ventilation
- Visible indentations deeper than 1.5 inches after 30 days
- Uneven expansion that doesn’t self-correct within 4 hours
- Any manufacturing defects like stitching issues or cover damage
Document everything with photos and timestamps—this evidence streamlines warranty claims and prevents delays in resolution.
Opening your Nectar mattress properly transforms what seems like a simple unboxing into a critical performance optimization step. By following these precise techniques, you’ll avoid the most common pitfalls that compromise mattress longevity and sleep quality. Remember that patience pays off—the few hours you invest in proper unboxing saves you from months of discomfort or the hassle of returns. Within 10 days, your Nectar mattress will reach its perfect comfort level, delivering the restful sleep you invested in. Now that you know exactly how to open Nectar mattress correctly, you’re ready to enjoy years of premium sleep comfort without unnecessary complications.


