
Waking up to a collapsing bed frame ranks among the most frustrating bedroom disasters. Learning how to build a mattress frame from scratch solves this problem while giving you a custom piece that perfectly fits your space and style. A well-constructed DIY mattress frame provides essential support for your mattress, eliminates annoying squeaks, and becomes the centerpiece of your bedroom décor. Unlike store-bought options that often use flimsy materials, your handmade frame will feature solid construction that lasts for decades.
Building a mattress frame combines practical engineering with artistic expression, allowing you to create furniture that perfectly matches your needs. This guide walks you through every step of the process, from selecting the right design to applying the final finish. Whether you’re a beginning woodworker or an experienced craftsman, learning how to build a mattress frame offers opportunities to master various joinery techniques while creating furniture that lasts for generations. With the right tools and approach, you can complete this project in a weekend with basic woodworking skills.
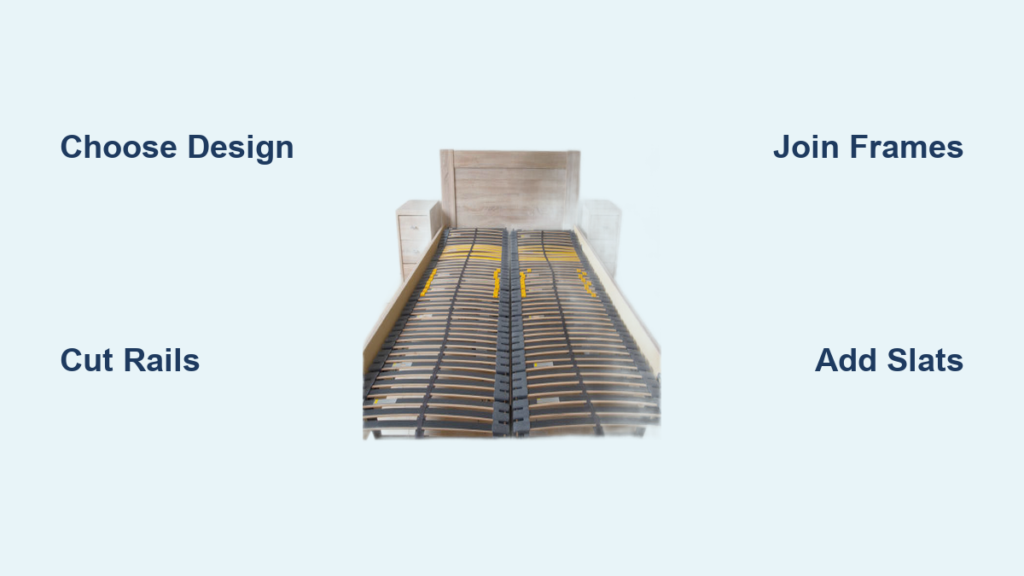
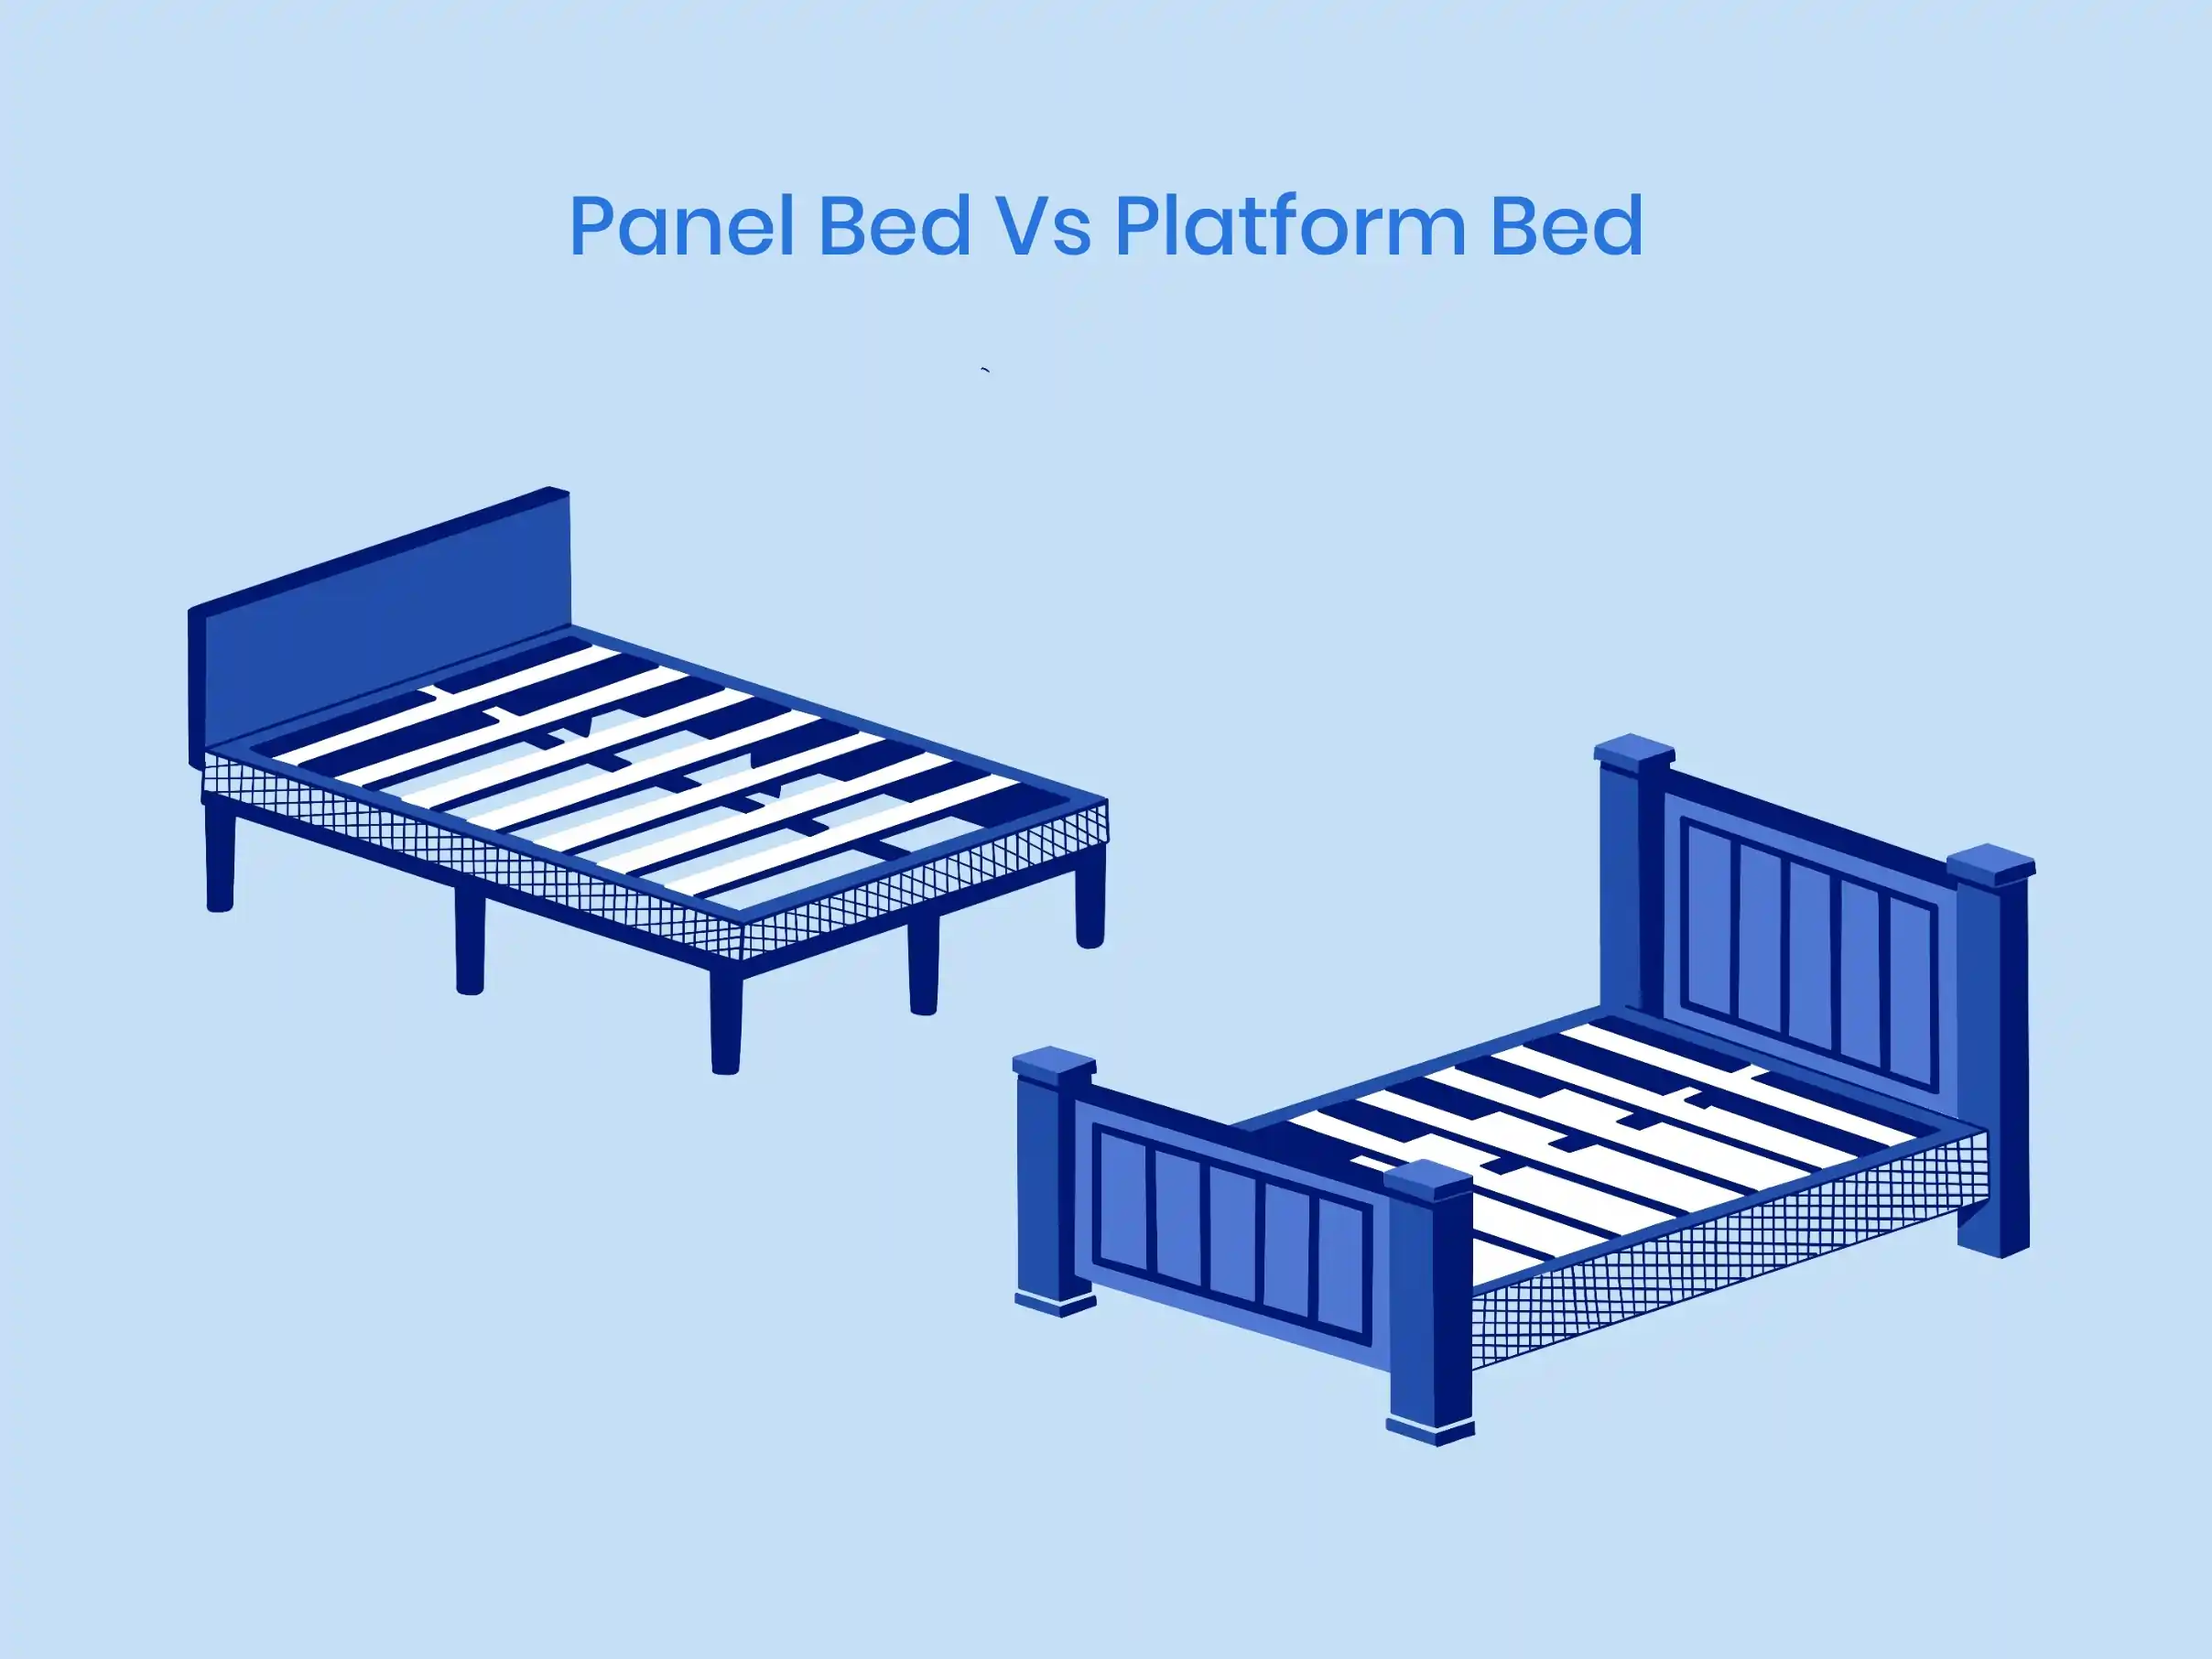
Platform vs. Traditional: Choosing Your Mattress Frame Design
Selecting the right design represents the most critical decision in your mattress frame project. The style you choose affects everything from material requirements to the joinery techniques you’ll employ. Each design category offers distinct advantages that appeal to different needs, skill levels, and aesthetic preferences.
Platform Bed Designs for Beginners
Platform bed designs provide the simplest and most versatile starting point for DIY builders. These low-profile structures support your mattress directly without requiring a box spring or foundation, making them both economical and visually appealing. The Easy Full Platform Bed offers an excellent entry point for beginners, with straightforward construction that requires minimal complexity. If you’re ready to advance, the Modern Platform Bed and Queen-Size Plywood Bed present slightly more sophisticated challenges while maintaining accessible construction methods.
Pro Tip: For your first mattress frame project, choose a platform design that uses basic butt joints with screws. This approach requires fewer specialized tools and less precision than traditional joinery methods, giving you confidence to tackle more complex designs later.
Traditional and Storage-Oriented Designs
Traditional and storage-oriented designs suit those who need additional functionality from their bedroom furniture. The Craftsman-Style Twin Bed and Wood and Leather Bed represent advanced projects requiring sophisticated joinery skills and significant time investment. For those prioritizing practicality, the Twin Bed with Storage incorporates drawers beneath the sleeping surface, maximizing bedroom storage without sacrificing floor space. These designs add complexity but deliver enhanced functionality that many homeowners find invaluable.
Farmhouse and Rustic Styles
Farmhouse and rustic styles continue trending in bedroom design, combining traditional joinery with contemporary styling cues. The Queen Size Modern Farmhouse Bedframe exemplifies this popular category, featuring clean lines, substantial timber elements, and finishes that highlight the natural beauty of the wood. The rustic aesthetic appeals to those seeking a warm, inviting bedroom atmosphere while maintaining the structural integrity required for daily use.
Complete Tool List for Building a Mattress Frame from Scratch
Before beginning your mattress frame project, ensure you have all necessary tools organized and ready. Having everything on hand prevents frustrating delays and allows you to maintain momentum through each construction phase.
Power Tools Checklist
Required Power Tools: A circular saw or table saw handles most lumber cutting tasks, while a drill with various bits serves for pilot holes, counterboring, and driving screws. A router with edge-forming bits creates decorative profiles and cuts joinery details. An orbital sander smooths surfaces before finishing, and clamps—bar clamps and pipe clamps in various sizes—hold pieces securely during glue-ups.
Pro Tip: Rent specialty tools like a mortiser or pocket hole jig from your local hardware store rather than purchasing them for a single project. This saves money while still giving you access to professional results.
Essential Materials by Bed Size
Standard construction uses readily available dimensional lumber that simplifies acquisition and reduces costs. A typical queen-size frame requires:
– 2×4 lumber for side rails (two pieces at 8 feet each)
– 2×4 stock for head and foot boards (two pieces at 4 feet each)
– 4×4 posts standing approximately 3 feet tall
– 1×3 boards for support slats (ten to twelve pieces)
Time Estimate: Gathering all materials typically takes 1-2 hours, depending on your local lumber yard’s inventory and your familiarity with woodworking materials.
Mortise and Tenon: The Strongest Joint for Your Mattress Frame
The joinery techniques you select determine both the strength and the visual character of your finished mattress frame. While simple butt joints with screws work for utilitarian pieces, traditional joinery creates connections that last decades while showcasing your craftsmanship.
Step-by-Step Mortise and Tenon Construction
Mortise and tenon joints represent the gold standard for bed frame construction, providing exceptional strength and durability that outlasts any other connection method. This technique involves creating a square or rectangular hole (mortise) in one piece to receive a corresponding projection (tenon) cut on the end of another piece.
- Mark shoulder positions on your rail ends using the post dimensions as a guide
- Cut the cheeks (sides of the tenon) with a backsaw or bandsaw
- Chisel out waste material between the cheeks to create the tenon tongue
- Test fit the joint and make minor adjustments with chisels as needed
- Apply wood glue to both surfaces before final assembly
Warning: Never force a tight tenon into a mortise—that creates internal stress that can cause failure later. Take time for proper fitting to ensure long-term durability.
Alternative Joinery Methods
Sliding dovetails provide an excellent alternative approach for connecting frame rails, offering both strength and visual appeal. This technique involves cutting a dovetail-shaped groove in one piece to receive a correspondingly shaped tenon on the joining piece. The angled dovetail shape prevents the joint from separating under tension while providing substantial gluing surface area.
Building Rock-Solid Side Rails for Your Mattress Frame
Side rails connect your headboard and footboard while providing the primary attachment points for mattress support. These components must be both strong and precisely dimensioned to ensure your mattress frame performs reliably for years of daily use.
Precise Rail Measurement and Cutting
The side rail length depends on your mattress size plus allowances for post dimensions. Standard mattress dimensions are:
– Twin: 39 inches wide
– Full: 54 inches wide
– Queen: 60 inches wide
– King: 76 inches wide
Add approximately 3 inches per side to accommodate the post diameters and any joinery shoulders. Cut your rail stock to length, then lay out tenons that will fit into the corresponding dados in your headboard and footboard posts.
Creating Smooth Edges and Finishes
Many builders route decorative profiles along visible rail edges, enhancing the visual appeal of the finished piece. A round-over bit creates a softened edge that feels pleasant to the touch and catches light attractively. More elaborate profiles, such as beads cut with a specialized plane or router bit, add visual interest while demonstrating craftsmanship.
Pro Tip: Sand rails to 180 grit before final assembly—this prevents difficult sanding after the frame is fully constructed and ensures a smooth finish on all surfaces.
Mattress Support Systems: Slats vs. Platform
The support system determines how comfortably your mattress performs and how long it lasts. Several proven approaches exist, each with distinct advantages depending on your design preferences and budget constraints.
Hardwood Slats Installation
Hardwood slat systems use multiple closely-spaced boards spanning between side rails, providing firm, slightly flexible support that many mattress manufacturers recommend. These slats typically measure approximately 3/4 inch thick and 2 to 3 inches wide, spaced roughly 2 to 4 inches apart to provide adequate support while allowing some flex for comfort.
- Attach a 2×2 board along the bottom edge of each side rail
- Measure and mark slat positions (2-4 inches apart)
- Cut slats to length with a circular saw
- Secure slats with finishing nails or screws
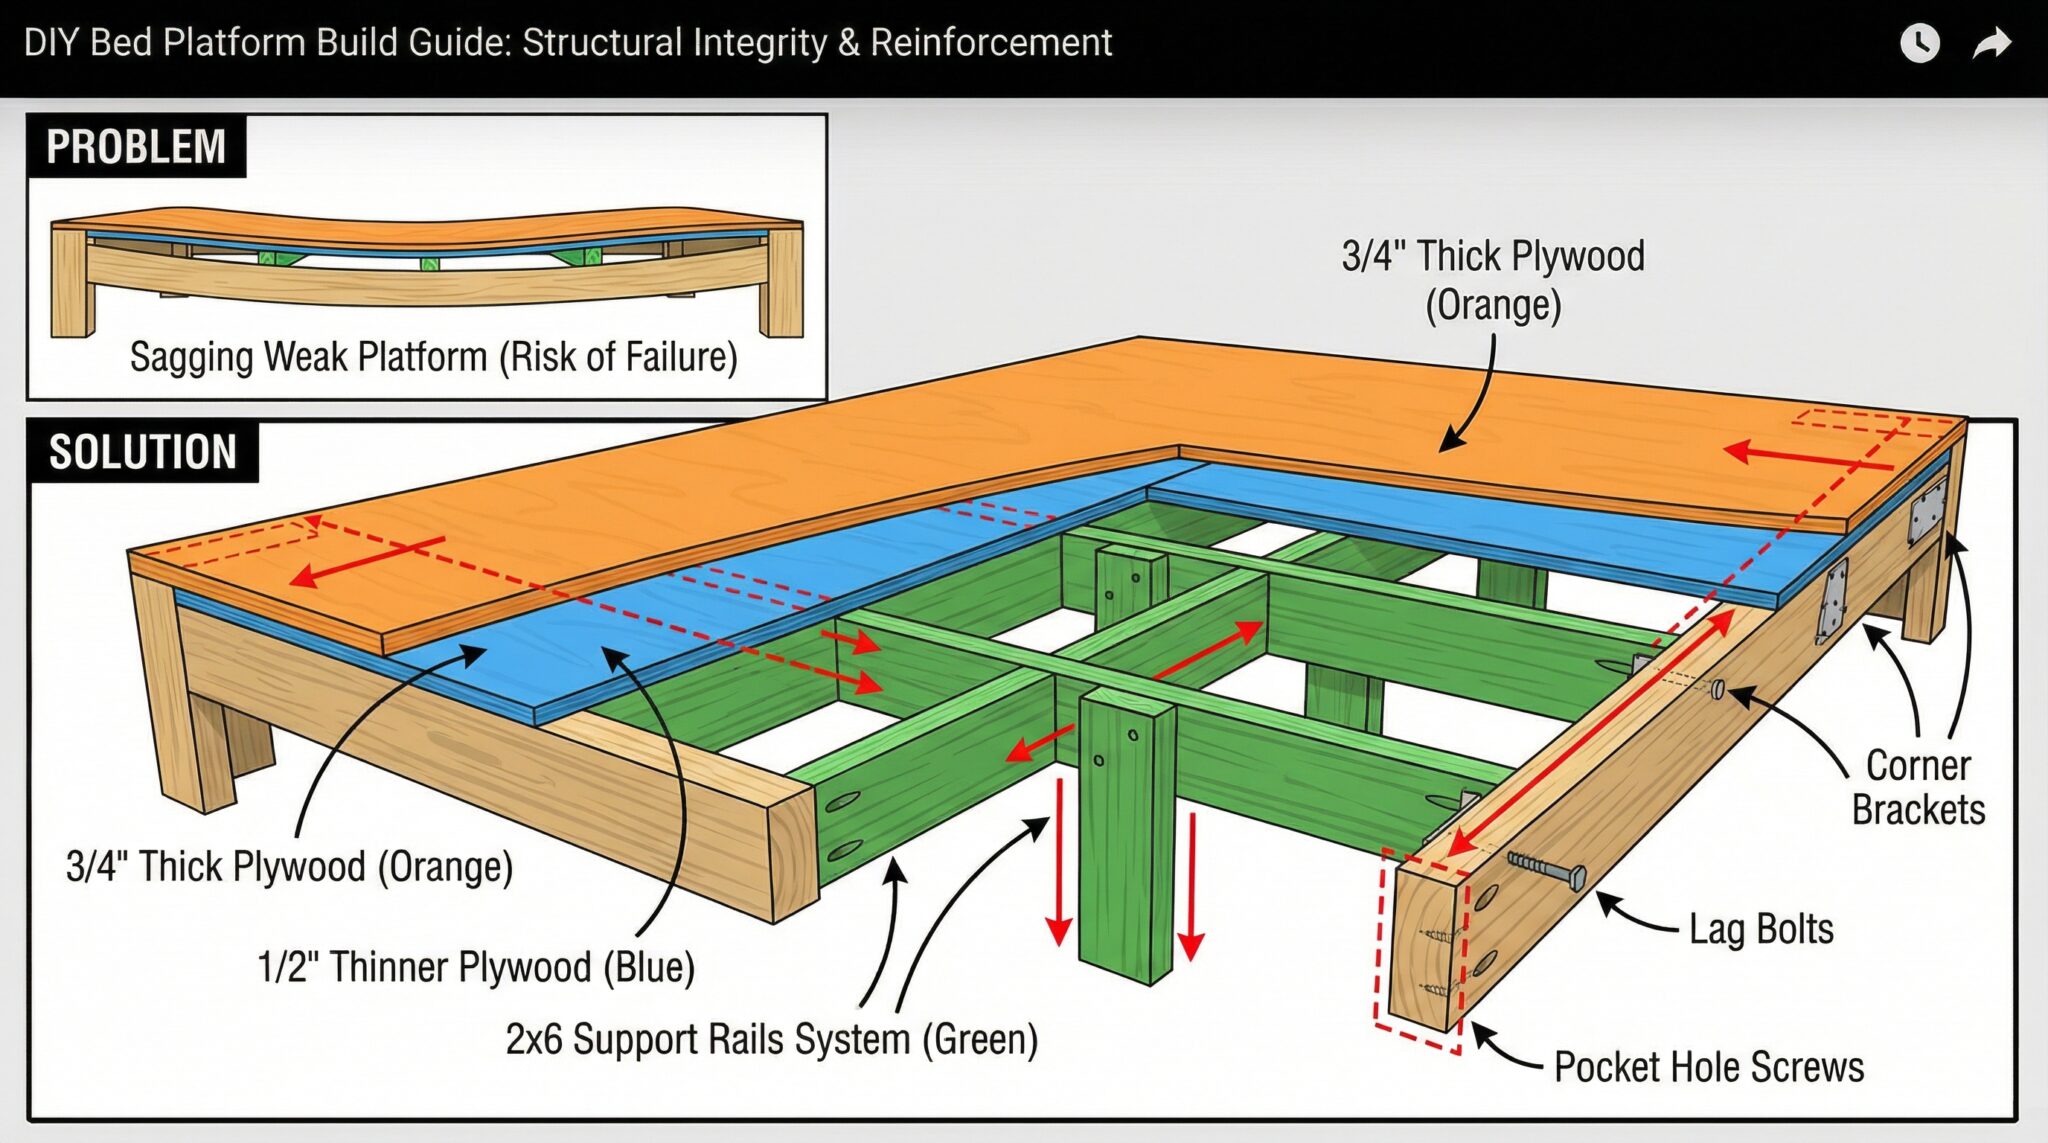
Solid Plywood Platform Construction
Solid plywood platforms provide completely uniform support, eliminating any possibility of mattress sagging between support elements. Use at least 3/4 inch thick plywood for queen-size beds and larger, with thicker material providing additional rigidity.
Time Estimate: Installing a slat system takes approximately 1 hour, while creating a torsion-box platform requires 2-3 hours but offers superior performance.
Hardware Installation: Securing Your Mattress Frame Components
With all major components complete, final assembly brings your mattress frame together into a functional piece of furniture. The hardware you choose affects both the frame’s appearance and its long-term durability.
Hidden Rail Fastener Techniques
Hidden rail fasteners create clean lines without exposed metal brackets, appealing to those preferring minimal hardware visibility. These systems typically involve metal pieces recessed into rail ends with corresponding receptacles in the legs, interlocking to create strong, ratchet-free connections.
Pro Tip: Test your hidden hardware system on scrap wood before installing it on your actual frame. This prevents mistakes on finished components and ensures you understand the installation process.
Counterbored Bolt Connections
Exposed hardware options include through-bolts with decorative washers, bed bolts, and specialized brackets that provide functional strength while contributing to the visual style. Counterbored holes for through-bolts allow bolt heads to sit below the wood surface, with wooden plugs covering the holes for a finished appearance.
When using counterbored connections, drill a larger-diameter hole (typically 3/8 inch or larger) to the depth of the bolt head, followed by a smaller pilot hole through the remaining material. The hardware pulls the joint tight as bolts are tightened, with counterbored recesses preventing any rocking or loosening over time.
Professional Finishing Techniques for Your Mattress Frame
The finishing process protects your mattress frame while bringing out the natural beauty of the wood. Numerous options exist, from clear finishes showcasing the wood’s grain to painted surfaces complementing your bedroom décor.
Sanding for a Flawless Finish
Sanding proceeds progressively through grits, typically beginning at 80 or 100 to remove major imperfections and advancing through 120, 150, and finally 180 grit for a smooth finish. Sand with the grain to produce clean results, as cross-grain sanding leaves visible scratches that show through the final finish.
Warning: Never skip grits during sanding—this creates unnecessary work later. Each grit should only need to remove the scratches from the previous one.
Staining and Topcoating Process
Stain application requires careful technique for uniform color. Apply stain evenly with a brush or rag, working in sections and wiping away excess before it dries. Address any drips or uneven areas immediately, as dried stain proves difficult to correct.
Seal coats and topcoats protect the underlying wood while providing your desired sheen level. Polyurethane finishes offer excellent durability and water resistance, making them ideal for furniture receiving heavy use. Most builders apply at least two topcoat layers, sanding lightly between coats for optimal adhesion and appearance.
Preventing Common Mattress Frame Problems: Maintenance Guide
Proper maintenance preserves your mattress frame’s appearance and structural integrity for decades of reliable service. Periodic inspection and timely repairs prevent small issues from becoming major problems.
Regular Inspection Points
Check connections regularly for loose bolts or hardware, particularly at corners where headboard and footboard meet side rails. Listen for squeaks or creaks during use, which often indicate developing looseness in joints or hardware. Address any issues promptly by tightening hardware, adding shims to eliminate movement, or consulting professional repair resources for significant problems.
Pro Tip: Apply beeswax to wooden tenons before assembly—it reduces squeaking and makes future disassembly easier if needed.
Seasonal Wood Movement Considerations
Wood movement over time may require adjustment of mortise and tenon joints as seasonal humidity changes cause expansion and contraction. Slightly enlarging tenons or adding shims helps maintain tight joints as wood changes dimensions. Finishing all wood surfaces, including end grain, reduces moisture exchange and minimizes seasonal movement that can loosen joints over time.
Building a mattress frame combines practical utility with creative expression, producing furniture that serves both functional and aesthetic purposes. The range of available designs accommodates virtually any skill level, style preference, and budget constraint. From simple platform beds requiring basic tools and skills to elaborate heirloom pieces showcasing advanced joinery, this project offers satisfying challenges for woodworkers at every level. Quality materials and construction methods produce furniture that endures for decades, becoming part of family history and daily life. Whether building for personal use or as gifts, creating a mattress frame provides both practical skills and lasting satisfaction with the completed piece.


