
Water damage to your sponge mattress can happen unexpectedly—a spilled drink, accidental bedwetting, or even excessive moisture during cleaning. Unlike traditional mattresses with springs, sponge and foam mattresses absorb liquid deep into their cellular structure, creating a breeding ground for mold and mildew if not properly dried. Knowing how to dry sponge mattress materials effectively can save you hundreds in replacement costs and ensure a healthy sleeping environment. This guide delivers actionable steps to restore your mattress without professional help, whether you’re dealing with a small spill or complete saturation.
Immediate Response: Extract Surface Moisture First
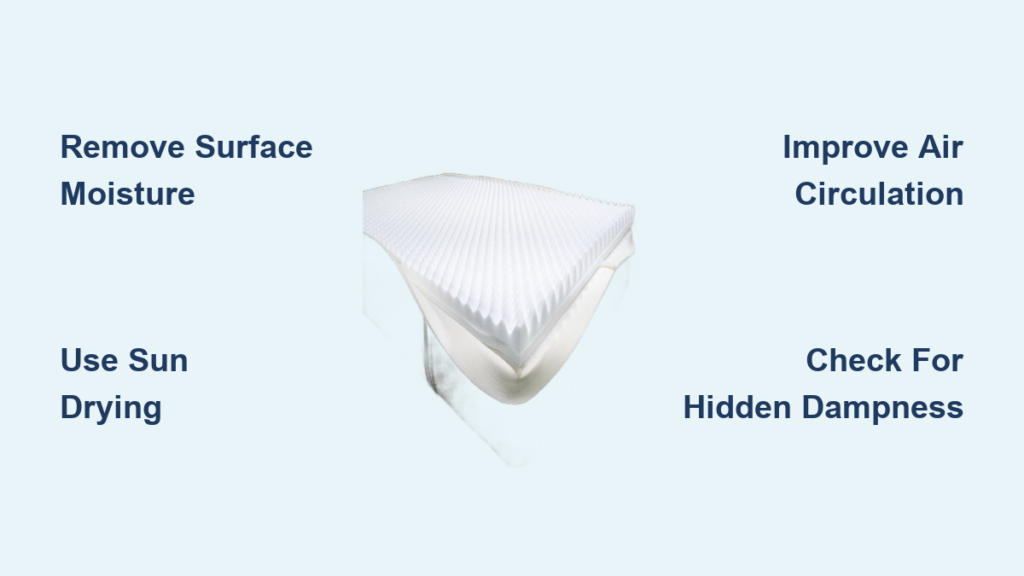
The critical first step in drying any sponge mattress is removing as much surface moisture as possible within the first 30 minutes. Foam’s dense cellular structure pulls liquid inward rapidly, so quick action prevents deeper penetration and reduces total drying time by up to 50%. Begin by stripping all bedding and protective covers immediately—these items will need separate washing to prevent cross-contamination.
Place multiple thick, absorbent towels over the wet area and apply firm, downward pressure without rubbing. Rubbing forces moisture deeper into the foam cells and can damage the mattress structure. Work methodically from the edges toward the center, replacing towels as they become saturated. For significant spills, try the compression technique: position towels both above and below the affected section, then press firmly with both hands or sit on the area to squeeze water out. This simple method can extract 60-70% of surface moisture before moving to advanced drying techniques.
Sun Drying Method: Natural and Effective
When weather permits, direct sunlight offers the most efficient way to dry sponge mattress materials completely. UV rays naturally kill bacteria and mold spores while warm temperatures accelerate evaporation. This method works best for smaller foam mattresses, toppers, or portable camping pads that can be easily transported outdoors.
Choose a location with maximum sun exposure—ideally a clean, dry deck, patio, or lawn surface. Elevate the mattress slightly using plastic sheeting or a clean tarp to prevent ground moisture reabsorption and allow air circulation underneath. Position the mattress flat with its largest surface facing upward to maximize sun exposure. Flip the mattress every two hours to ensure even drying on all sides, as foam dries from the outside inward.
Under optimal conditions (75°F+ with low humidity), moderate spills dry completely in 6-8 hours. Heavily saturated mattresses may need 24-48 hours of sun exposure with regular flipping. Bring the mattress indoors overnight to prevent dew accumulation, which could undo your drying progress. Remember to vacuum both sides after sun drying to remove any dust or debris that collected during the process.
Indoor Air Circulation Techniques

For rainy weather or larger mattresses that can’t be moved outdoors, strategic indoor air circulation provides excellent drying results. The key is creating cross-ventilation that moves air across all mattress surfaces simultaneously. Position the mattress vertically against a wall if possible—this exposes both sides to airflow and prevents moisture trapping against the floor.
Set up multiple fans to create air movement from different angles: one blowing across the top surface, another positioned below to lift air upward, and a third placed to exhaust moist air from the room. Oscillating fans work particularly well as they distribute air over wider areas. For faster results, implement the “sandwich method”—place the mattress between layers of clean, absorbent towels or microfiber cloths, then position fans to blow air through this layered setup. Change the absorbent layers every 30-60 minutes as they become damp.
Running a dehumidifier alongside your fans dramatically improves results by maintaining indoor humidity below 50%, which prevents reabsorption of moisture. This combination typically dries moderately wet sponge mattresses in 24-36 hours, compared to 48-72 hours with fans alone.
Heat-Based Drying Solutions
Controlled heat application speeds evaporation but requires careful management to avoid damaging foam materials. Never place heating elements directly against the mattress surface—maintain at least 12 inches of clearance to prevent melting or warping. Ideal drying temperatures range between 80-90°F; the foam should feel warm but never uncomfortably hot to the touch.
Space heaters with thermostatic controls provide consistent, gentle warmth when positioned diagonally to blow across the mattress rather than directly onto it. Run the heater intermittently—30 minutes on, 30 minutes off—to maintain safe temperatures while allowing moisture time to migrate to the surface. For spot drying stubborn damp areas, use a hair dryer on medium heat setting while keeping it in constant motion at least 6 inches from the surface. This targeted approach works best after primary drying methods have reduced overall moisture content.
Professional-Grade Equipment Options
For severe water damage or time-sensitive situations, professional equipment delivers superior results. Renting a wet-dry shop vacuum with upholstery attachment provides powerful extraction capabilities that remove moisture from deep within foam cells. After initial towel blotting, run the vacuum attachment firmly across all surfaces using slow, overlapping passes. This method can extract surprising amounts of hidden water—foam mattresses often hold 2-3 times their visible moisture content.
Industrial air movers move 3-4 times more air than household fans, cutting drying time in half. Position them to blow across the mattress surface at a 45-degree angle, creating a sweeping airflow that carries moisture away efficiently. For complete immersion scenarios, consider renting a specialized mattress drying chamber or consulting water damage restoration professionals who have equipment designed specifically for foam drying applications.
Identifying Hidden Moisture Problems

Surface dryness doesn’t guarantee complete moisture removal from sponge mattresses. Hidden dampness creates ideal conditions for mold growth within 24-48 hours. Perform the “plastic sheet test” for definitive moisture detection: tape a 12×12 inch section of clear plastic tightly over a suspicious area. After 3-4 hours, condensation on the underside confirms residual moisture beneath.
The weight comparison method provides quick assessment—lift different sections of the mattress; damp areas feel noticeably heavier. Press firmly on various spots; dry foam springs back immediately while damp foam compresses more easily and returns slowly. Run your hand across the surface feeling for cool spots, which indicate evaporative cooling from remaining moisture. These simple checks prevent premature mattress return to service.
Preventing Mold and Mildew Growth
Thorough drying within the first 24 hours represents your best defense against mold growth in sponge mattresses. Maintain room temperatures above 70°F and humidity below 50% during the drying process. Run dehumidifiers continuously to remove moisture from the air, preventing reabsorption into the foam.
Sunlight exposure provides natural UV sanitization that kills surface mold spores. For indoor drying, consider UV-C sanitizing lamps after the mattress feels dry to the touch—these specialized bulbs eliminate surface bacteria without damaging foam. Allow an additional 24-hour airing period after the mattress appears dry before applying bedding, ensuring complete moisture evaporation from deep within the cellular structure.
Maintenance Tips for Future Protection
Prevent future moisture disasters by implementing these protective measures. Use a high-quality waterproof mattress protector designed specifically for foam mattresses—look for breathable polyurethane options that block liquids while allowing air circulation. Full encasements that cover all sides provide better protection than standard fitted sheets.
Rotate your sponge mattress 180 degrees monthly to distribute wear evenly and inspect all surfaces for early moisture detection. Address minor spills immediately using the towel compression method before moisture penetrates deeply. Wash mattress protectors monthly in cold water to maintain their waterproofing effectiveness without damaging the protective membrane.
When Replacement Becomes Necessary
Despite proper drying techniques, some situations require mattress replacement. Persistent musty odors after thorough drying indicate deep-seated mold growth that cannot be eliminated. Visible mold colonies—appearing as black, green, or white spots—mean the foam structure has been compromised beyond safe restoration.
Mattresses exposed to floodwater or sewage contamination should always be replaced due to dangerous pathogens that penetrate deep into foam cells. Similarly, mattresses that remain damp for more than 72 hours typically develop irreversible mold growth within the cellular structure. When in doubt, consult a professional—your health is worth more than the cost of a new mattress.
Restoring a wet sponge mattress requires patience and proper technique, but following these methods ensures successful drying in most cases. Act quickly with initial moisture extraction, choose appropriate drying methods for your situation, and verify complete dryness before returning your mattress to use. Remember that thoroughness matters more than speed—taking extra time to ensure complete moisture removal protects your health and extends your mattress’s lifespan significantly. By implementing preventive measures after restoration, you’ll minimize future moisture risks and enjoy comfortable, hygienic sleep for years to come.


