
A spilled drink, a leaking pipe while you’re away, or an unexpected accident can leave your foam mattress soaked in minutes. Unlike traditional innerspring mattresses, memory foam absorbs liquid rapidly and holds onto moisture, creating the perfect breeding ground for mold, mildew, and permanent damage if not addressed correctly. Knowing exactly how to clean a wet foam mattress using proper techniques can save you from expensive replacements and protect your sleep environment. This comprehensive guide walks you through every step of the process, from immediate emergency response to preventive maintenance, using only foam-safe methods that preserve your mattress while effectively removing moisture and odors.
The unique properties that make memory foam comfortable—its ability to contour to your body and distribute weight evenly—also make it exceptionally absorbent and slow to dry. Once liquid penetrates the viscoelastic foam core, it travels deep into the layers, making thorough cleaning essential. With the right approach, however, you can successfully restore your mattress and extend its lifespan significantly. What follows are the proven techniques that professionals use, adapted for home application.
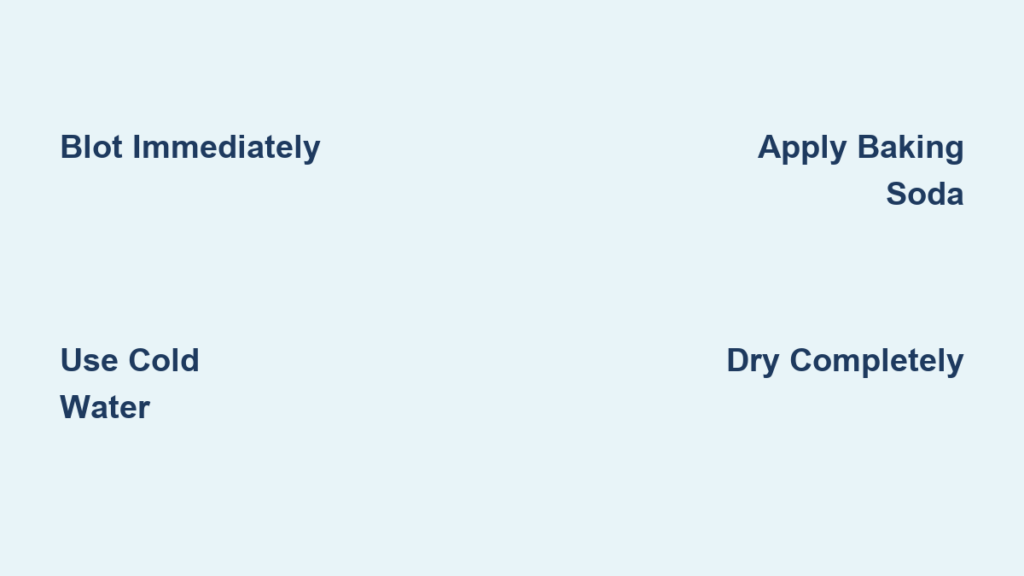
Immediate Response for Wet Spills
When liquid first contacts your foam mattress, the clock starts ticking. The faster you begin proper treatment, the better your chances of preventing stains, odors, and structural damage. Foam mattresses cannot be submerged or heavily soaked without risking permanent harm, so your response must be precise and immediate.
Blotting Technique Matters
Your first and most critical action is proper blotting, which differs significantly from wiping or rubbing. Take a clean, dry cloth or several paper towels and press them firmly against the wet area using a dabbing or pressing motion. The goal is to absorb moisture upward out of the foam rather than pushing it deeper or spreading it sideways. Work from the outside edges of the spill toward the center to prevent the liquid from spreading to clean areas. Replace your cloth or towels with fresh dry sections as they become saturated, continuing until no more moisture transfers from the mattress. This process may require 15-30 minutes of patient work for larger spills, but rushing through it compromises your results significantly.
Why Cold Water Is Essential
Whenever you clean a foam mattress—whether addressing fresh spills, treating stains, or performing routine cleaning—always use cold water. Hot water might seem more effective for cleaning, but it actually sets protein-based stains like blood and sweat into the foam fibers permanently. More concerning, heat damages the viscoelastic structure of memory foam, causing it to lose its supportive properties over time. Cold water keeps stains at the surface where they can be lifted away and preserves the foam’s integrity. This rule applies to every cleaning solution you prepare, from mild detergent mixtures to vinegar sprays.
Repeat Blotting Until Dry
After your initial blotting pass, the mattress surface may appear dry while significant moisture remains trapped deep in the foam. Continue applying gentle pressure with dry cloths, allowing the foam to release its absorbed moisture slowly. You cannot rush this phase—foam releases liquid gradually through its open-cell structure. Expect to repeat the blotting process multiple times, switching to fresh dry cloths each round. Patience during this stage prevents the trapped moisture that leads to mildew problems weeks or months later.
Baking Soda Deep Cleaning Method

Baking soda serves as the workhorse of foam mattress care, performing triple duty as a drying agent, odor neutralizer, and stain lifter. This inexpensive household staple is completely safe for foam materials and remarkably effective when applied correctly.
Apply Baking Soda for Moisture
Once you’ve blotted up the bulk of the liquid, sprinkle a generous layer of baking soda over the affected area. Use enough to create a visible, powdery covering—typically several tablespoons for a spill the size of your hand. The baking soda works through capillary action, drawing remaining moisture from deep within the foam to the surface where it can evaporate. For best results, allow the baking soda to remain in place for at least 10 minutes, though leaving it for 8-24 hours dramatically improves moisture absorption, particularly for larger spills or when addressing odors alongside wetness.
Deodorize With Extended Treatment
Baking soda neutralizes odors chemically rather than simply masking them with fragrance, making it essential for foam mattress care. Body oils, sweat, pet dander, and organic spills all create musty smells that become trapped in foam’s porous structure. To deodorize your entire mattress rather than just a spot, sprinkle a light layer of baking soda over the entire surface, concentrating on areas that seem to harbor the strongest odors. Allow it to sit for 8-12 hours, preferably overnight, in a well-ventilated room. The extended contact time allows the baking soda to penetrate deeper into the foam and absorb both residual moisture and odor molecules effectively.
Vacuum Baking Soda Thoroughly
After the treatment period, removing all baking soda residue is crucial for achieving professional results. Use your vacuum cleaner with the upholstery or brush attachment, working in slow, overlapping strokes to ensure complete removal. Pay special attention to seams, crevices, and any tufted areas where powder tends to accumulate. For the best outcome—and to simultaneously remove dust mites, dead skin cells, and allergens—use a vacuum equipped with a HEPA filter. If any residue remains visible, go over the area again; leftover baking soda can create a gritty texture when you sleep on the mattress.
Vinegar Solution Application
White vinegar complements baking soda in foam mattress care, offering natural deodorizing properties and mild cleaning power that breaks down organic residues without damaging foam materials.
Deodorizing Vinegar Spray
Create an effective deodorizing solution by mixing equal parts white vinegar and water in a spray bottle. Lightly mist the affected area—avoid saturating the foam, as excessive moisture creates mildew risks. The vinegar smell seems strong initially but dissipates completely as the solution dries, carrying embedded odors away with it. Allow the treated area to air dry completely before making the bed. For stubborn odors that persist through the first treatment, repeat the application after the area has dried fully.
Treat Urine Stains Effectively
Urine presents unique challenges because it contains uric acid crystals that bond to foam fibers and cause persistent odors if not properly dissolved. After blotting up as much urine as possible, spray the affected area with undiluted white vinegar, ensuring the area becomes damp but not soaked. Let the vinegar sit for 10 minutes, giving it time to break down the uric acid crystals chemically. Blot away the vinegar with clean, dry cloths, then apply a thick layer of baking soda over the area. Allow the baking soda to remain for up to 12 hours before vacuuming thoroughly. Set-in urine stains may require repeating this entire process multiple times for complete removal.
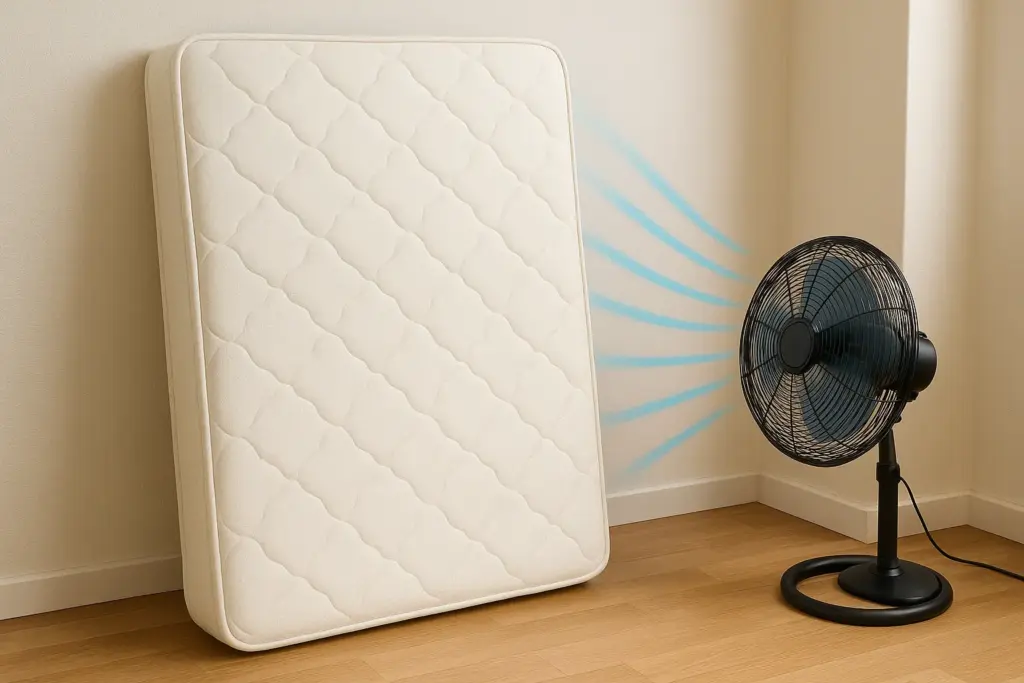
Drying Your Mattress Completely
Proper drying represents the most critical phase of foam mattress cleaning. Inadequate drying leads to mildew growth, bacteria proliferation, and persistent musty odors that become increasingly difficult to eliminate over time.
Air Drying Best Practices
After any wet cleaning process, allow your mattress to air dry completely before replacing bedding. Position the mattress in a well-ventilated area with good air circulation—near an open window with a fan blowing across the surface works excellently. Keep the mattress uncovered during drying to allow moisture to escape from all surfaces. Small damp areas typically dry within a few hours, while larger treated sections may require 12-24 hours or longer. Never rush this process by putting damp bedding on a partially dry mattress, as this creates ideal conditions for mildew growth.
Verify Complete Dryness
Before reassembling your bed, confirm that the mattress is completely dry throughout. Press your hand firmly against the foam in multiple areas—if you detect any dampness or coolness, additional drying time is needed. Alternatively, place a dry towel over suspect areas and press down; if the towel absorbs moisture, continue drying. For peace of mind after deep cleaning or significant spills, allow at least 24 hours of drying time before making the bed.
Why to Avoid Steam Cleaning
.webp)
Despite its effectiveness on many surfaces, steam cleaning causes significant damage to foam mattresses and should be avoided entirely.
Steam Cleaning Risks
The intense heat and moisture from steam cleaners degrade memory foam structure, causing it to lose shape and support properties permanently. Steam drives moisture deep into foam layers where it becomes trapped, creating hidden mildew growth that may not become apparent until serious damage has occurred. Many mattress warranties explicitly exclude damage caused by steam cleaning, meaning this method could void your protection. The foam’s design responds to body heat and pressure, and excessive additional heat alters these properties irreversibly.
Safer Alternatives
For periodic deep cleaning, the baking soda and vacuum method described earlier provides effective results without steam cleaning risks. The combination of mild detergent solution, targeted stain treatment, and extended baking soda application refreshes your mattress safely. If your mattress requires more intensive cleaning than home methods provide, seek professional cleaning from technicians experienced specifically with foam products rather than attempting steam cleaning yourself.
Prevention Strategies
Preventing stains and soiling is significantly easier than treating them after they occur. Implementing preventive measures extends cleaning intervals and reduces permanent damage risk.
Essential Mattress Protectors
A quality waterproof mattress protector provides the single most effective protection for your foam mattress. Protectors create barriers against spills, accidents, dust, dirt, and allergens while remaining breathable for comfort. Choose protectors that are waterproof yet breathable—waterproofing guards against spills while breathability prevents heat buildup. Most protectors are machine washable, making them easy to clean and replace. Select a protector that fits your mattress depth properly without bunching or shifting.
Regular Bedding Maintenance
Wash sheets, pillowcases, and bedding in hot water at least once weekly. Hot water kills dust mites, bacteria, and allergens that migrate onto your mattress surface. Never leave bedding on for more than two weeks between washes. Clean bedding prevents transfer of body oils, sweat, and dead skin cells that feed dust mites and create odors.
Common Mistakes to Avoid
Understanding what not to do protects your mattress from preventable damage during cleaning.
Never Use Excessive Water
Foam absorbs water readily and releases it slowly, making it extremely susceptible to mold growth when oversaturated. Apply cleaning solutions sparingly, dampening rather than soaking the mattress. Ensure absolutely complete drying before using the mattress again.
Avoid Rubbing Stains
Rubbing pushes stains deeper into foam fibers and damages foam structure by breaking down cell walls. Always use blotting and gentle dabbing motions. For dried stains, apply appropriate solutions and allow them to work before attempting removal.
Skip Harsh Chemicals
Avoid bleach, ammonia, and aggressive cleaning chemicals that break down foam materials and cause permanent damage. Stick to mild, foam-safe cleaners like diluted dish soap, laundry detergent, white vinegar, and baking soda.
Never Skip Drying Time
Never reassemble your bed before the mattress dries completely. Even slightly damp foam provides ideal conditions for mildew growth, creating persistent odors and potential health issues. When uncertain, allow additional drying time.


